
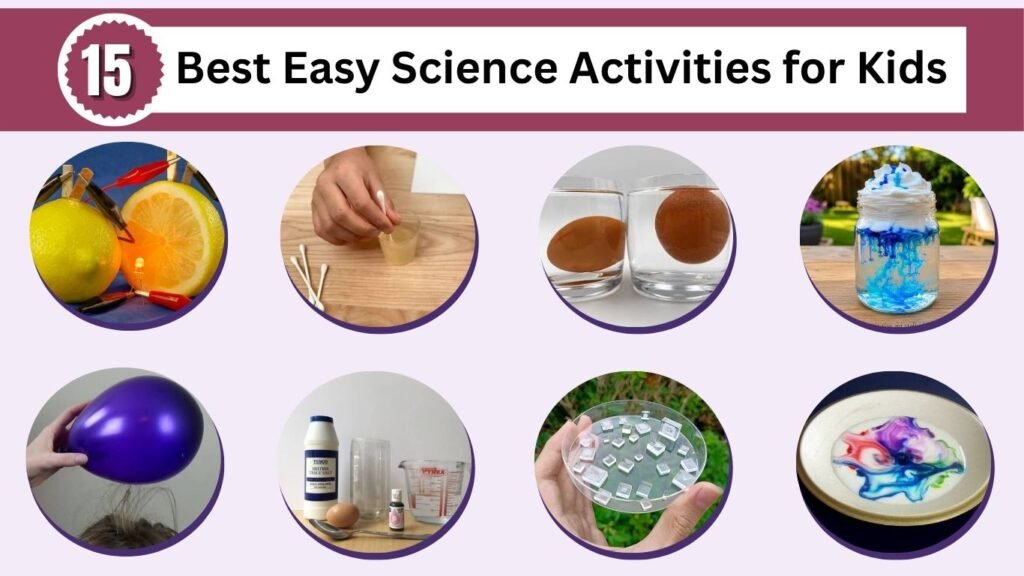
Make learning exciting with these 15 best easy science activities for kids that combine fun, creativity, and hands-on discovery. From colorful volcano eruptions and rainbow water experiments to floating eggs and homemade lava lamps, these simple activities introduce fascinating scientific concepts. Perfect for home or classroom learning, these engaging experiments encourage curiosity, problem-solving, and critical thinking using everyday household materials.
1. Baking Soda and Vinegar Volcano
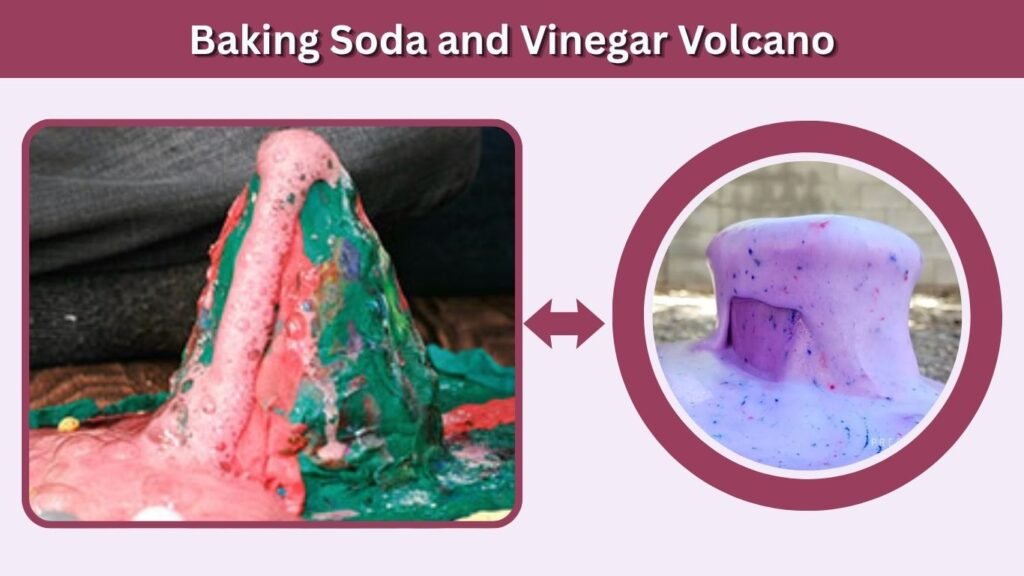
The baking soda and vinegar volcano is a fun and easy science activity that introduces kids to basic chemistry through an exciting bubbling reaction. Children create a miniature volcano and watch colorful foam erupt when baking soda reacts with vinegar. This hands-on experiment encourages curiosity, observation, and problem-solving while making scientific learning enjoyable and interactive.
Materials Needed
- Baking Soda: Creates the bubbling chemical reaction.
- White Vinegar: Reacts with baking soda to produce gas.
- Plastic Bottle: Holds the ingredients inside the volcano.
- Food Coloring: Creates a colorful lava effect.
- Dish Soap: Makes the eruption foamier.
- Modeling Clay: Helps shape the miniature volcano.
- Plastic Tray: Collects the overflowing foam and prevents spills.
How to Make a Baking Soda and Vinegar Volcano
Start by placing a small plastic bottle in the center of a large tray. Help your child shape modeling clay around the bottle to create a volcano, leaving the opening uncovered.Add two tablespoons of baking soda, a few drops of red food coloring, and a small amount of dish soap to the bottle.Ask your child to predict what will happen when vinegar is added. Slowly pour approximately half a cup of white vinegar into the bottle.Watch as colorful foam bubbles up and flows down the sides of the volcano. Explain that baking soda and vinegar react to produce carbon dioxide gas, which creates the bubbling eruption.
Learning & Development Benefits
This science activity introduces children to basic chemistry and cause-and-effect relationships. Kids discover how mixing different substances can create a visible chemical reaction.Building the volcano encourages creativity, fine motor coordination, and problem-solving skills. Measuring ingredients also supports early mathematical learning.Making predictions and observing the eruption strengthens scientific curiosity, concentration, and critical thinking.
2. Rainbow Walking Water Experiment
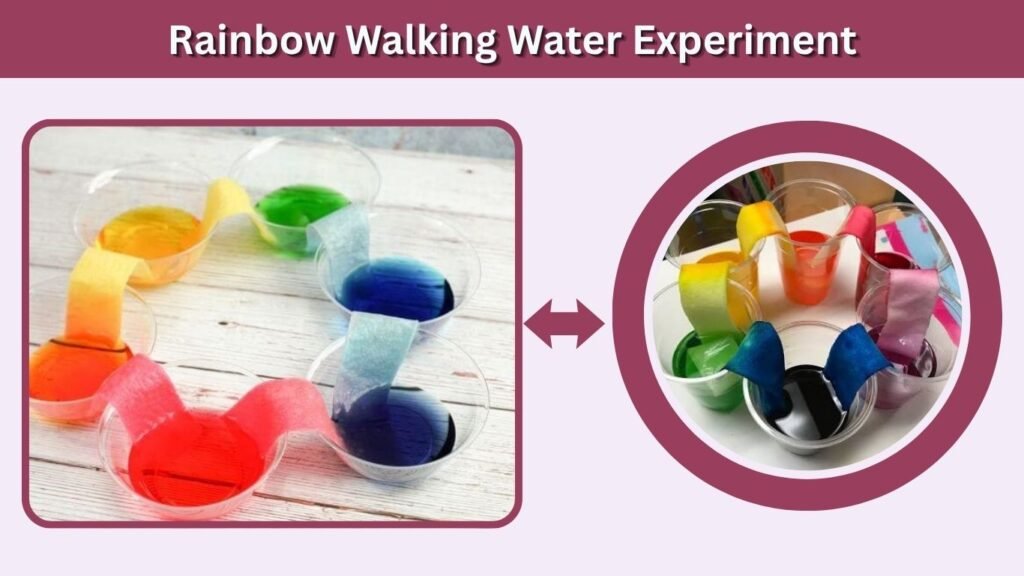
The rainbow walking water experiment is a colorful and easy science activity that teaches kids about capillary action and color mixing. Children watch colored water travel between cups through paper towels, gradually creating beautiful rainbow colors. This hands-on experiment encourages curiosity, observation, and scientific thinking while helping kids understand how water moves through absorbent materials.
Materials Needed
- Clear Plastic Cups: Hold water and allow children to observe color changes.
- Water: Moves between cups through the paper towels.
- Food Coloring: Creates bright rainbow colors.
- Paper Towels: Absorb and transfer colored water.
- Plastic Tray: Protects the table from accidental spills.
- Plastic Spoons: Help mix the food coloring.
- Paper and Pencil: Record predictions and observations.
How to Do the Rainbow Walking Water Experiment
Start by arranging seven clear plastic cups in a straight line. Fill the first, third, fifth, and seventh cups halfway with water, leaving the other cups empty.Add red food coloring to the first and seventh cups, yellow to the third cup, and blue to the fifth cup.Fold six paper towels into narrow strips. Place one end of each strip into one cup and the other end into the neighboring cup.Ask your child to predict what will happen. Over time, colored water travels through the paper towels and enters the empty cups.Watch as the colors mix to create orange, green, and purple, forming a rainbow effect.
Learning & Development Benefits
This science activity introduces children to capillary action, which allows water to move through tiny spaces in absorbent materials.Kids also learn about primary and secondary colors as different colored liquids combine.Observing the gradual changes encourages patience, concentration, and scientific curiosity. Comparing water levels and identifying colors supports early mathematical and observation skills.Making predictions and discussing the results also strengthens critical thinking and communication abilities.
3. Sink or Float Experiment
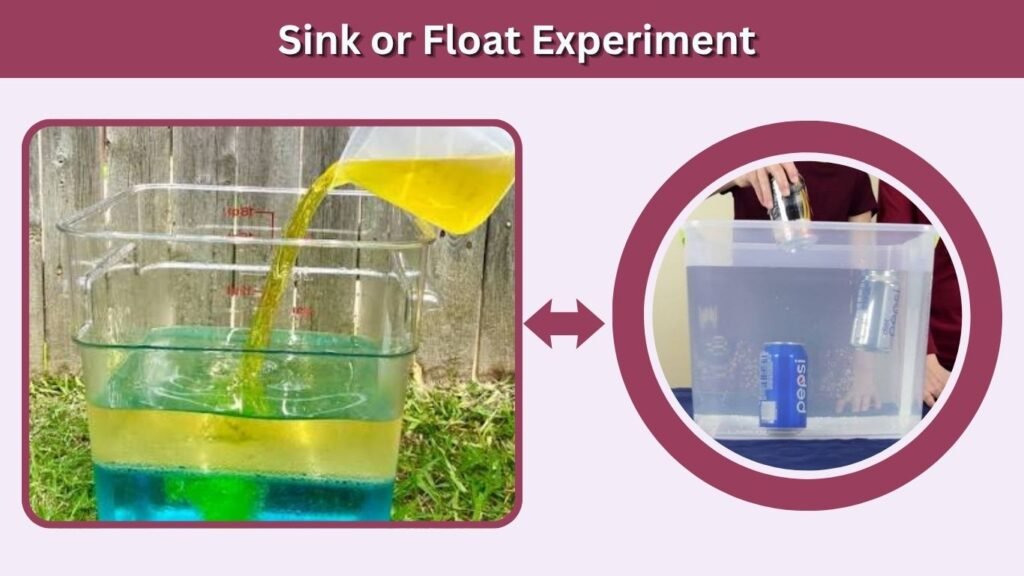
The sink or float experiment is a simple and engaging science activity that introduces kids to buoyancy, density, and the properties of different materials. Children place everyday household objects in water and discover whether they sink or float. This hands-on experiment encourages curiosity, prediction, and problem-solving while helping kids understand how an object’s shape and overall density influence its behavior in water.
Materials Needed
- Clear Plastic Container: Holds water for testing different objects.
- Water: Provides the environment for the experiment.
- Wooden Blocks: Demonstrate objects that commonly float.
- Plastic Toys: Allow children to test different shapes and materials.
- Smooth Stones: Demonstrate objects that usually sink.
- Plastic Spoons: Provide additional items for comparison.
- Observation Chart: Records predictions and experiment results.
How to Do the Sink or Float Experiment
Start by filling a wide plastic container with a small amount of water. Place the container on a stable table or waterproof tray.Collect several safe household objects, including wooden blocks, plastic toys, smooth stones, and plastic spoons.Show each object to your child and ask whether they think it will sink or float. Record their predictions on a simple observation chart.Allow children to gently place one object at a time into the water. Watch what happens and compare the results with their predictions.Explain that floating depends on an object’s overall density and the amount of water it displaces.Encourage kids to test additional objects and sort them into sinking and floating groups.
Learning & Development Benefits
This science experiment introduces children to basic physics concepts, including buoyancy, density, and water displacement.Making predictions and observing results develops scientific reasoning, curiosity, and critical-thinking skills.Sorting objects into sinking and floating categories strengthens classification and early mathematical abilities.Handling different objects also improves hand-eye coordination and observation skills. Discussing why certain materials float or sink encourages communication and a deeper understanding of cause-and-effect relationships.
4. Dancing Raisins Experiment
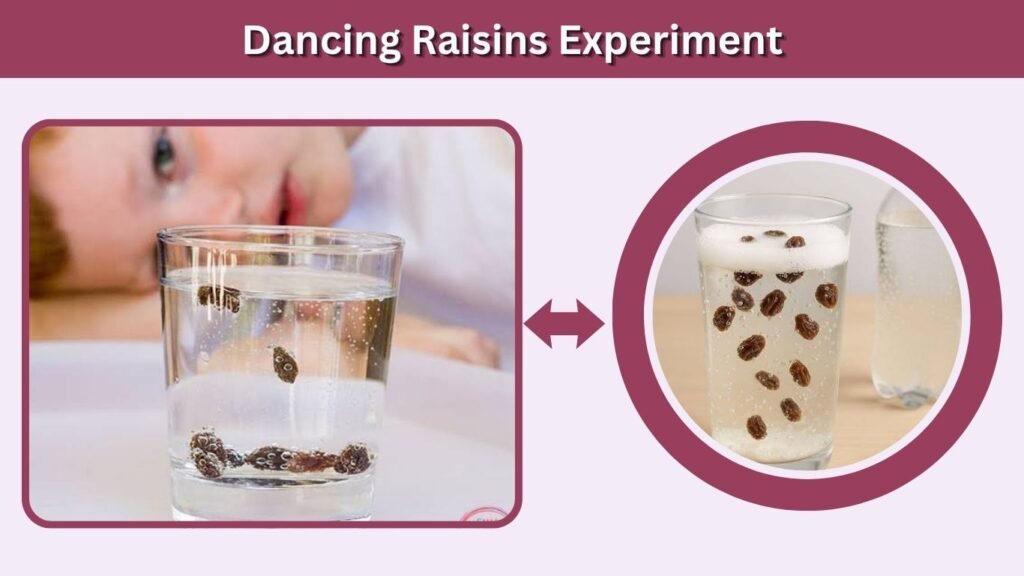
The dancing raisins experiment is a fun and easy science activity that teaches kids about buoyancy, gas bubbles, and density. Children place raisins in carbonated water and watch them rise and fall as bubbles attach to their surfaces. This simple experiment encourages curiosity, observation, and scientific thinking while helping kids understand how gases can influence the movement of objects in liquids.
Materials Needed
- Raisins: Small dried fruits used to demonstrate movement.
- Carbonated Water: Provides bubbles that help the raisins float.
- Clear Plastic Cups: Allow children to observe the experiment.
- Plain Water: Provides a comparison with carbonated water.
- Plastic Spoon: Helps place raisins into the cups.
- Plastic Tray: Protects the surface from accidental spills.
- Paper and Pencil: Record predictions and observations.
How to Do the Dancing Raisins Experiment
Start by filling one clear plastic cup with carbonated water and another with plain water. Place both cups on a stable table or plastic tray.Ask your child to predict what will happen when raisins are added to each cup.Drop three or four raisins into the carbonated water and watch carefully. Carbon dioxide bubbles attach to the raisins, increasing their buoyancy and causing them to rise.When the bubbles escape at the surface, the raisins may sink again. This movement can repeat several times, creating a dancing effect.Add raisins to the plain water and compare the results. Encourage children to describe their observations and explain the differences.
Learning & Development Benefits
This science activity introduces children to buoyancy, density, and the behavior of gas bubbles in liquids. Kids discover how attached bubbles can temporarily change whether an object rises or sinks.Making predictions and comparing results strengthens observation, critical thinking, and problem-solving skills.Counting the raisins and recording their movements supports early mathematical learning.The experiment also encourages scientific curiosity, patience, and communication as children describe what happens and discuss possible explanations.
5. Magic Milk Color Experiment
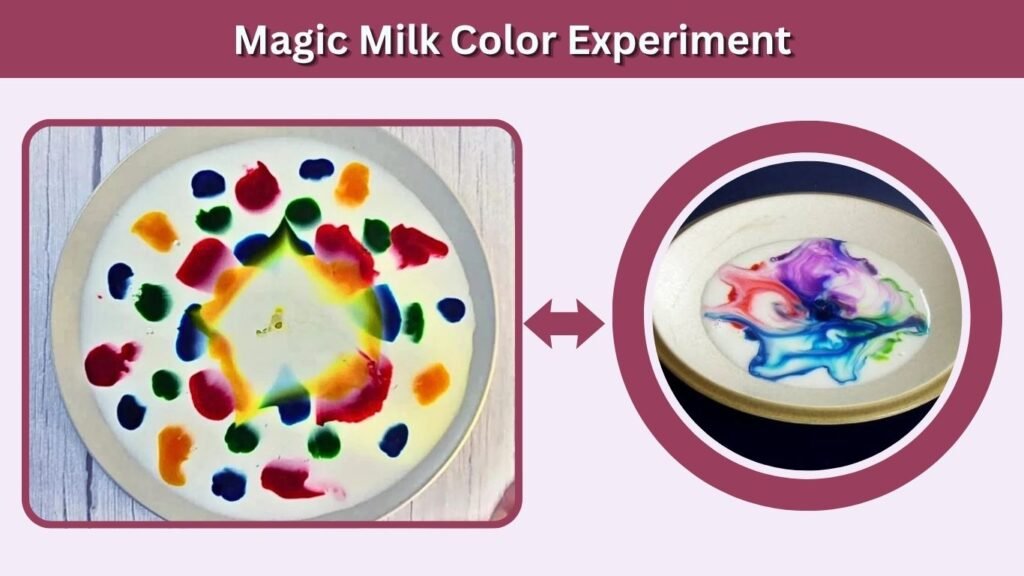
The magic milk color experiment is a colorful and exciting science activity that introduces kids to surface tension and the interaction between soap and milk. Children add drops of food coloring to milk and watch the colors swirl when dish soap touches the surface. This hands-on experiment encourages curiosity, observation, and creativity while helping kids explore simple scientific concepts using everyday household materials.
Materials Needed
- Whole Milk: Provides the liquid for the experiment.
- Food Coloring: Creates colorful patterns and movement.
- Dish Soap: Changes surface interactions and causes the colors to move.
- Cotton Swabs: Help apply small amounts of dish soap.
- Shallow Plate: Holds the milk during the experiment.
- Plastic Tray: Protects the table from spills.
- Paper and Pencil: Record observations and experiment results.
How to Do the Magic Milk Color Experiment
Start by pouring a thin layer of whole milk into a shallow plate. Place the plate on a stable table or plastic tray.Add several drops of different food colors near the center of the milk. Keep the drops separated so children can observe how the colors move.Ask your child to predict what will happen when dish soap touches the milk. Dip a cotton swab into a small amount of dish soap and gently touch it to the milk’s surface.Watch as the colors rapidly spread, swirl, and form colorful patterns.Explain that dish soap reduces surface tension and interacts with fats and other components in the milk, creating movement that carries the food coloring.Encourage children to repeat the experiment by touching different areas of the milk.
Learning & Development Benefits
This experiment introduces kids to basic scientific concepts involving surface tension, liquids, and the properties of soap.Watching the colorful patterns encourages observation, curiosity, and creative thinking.Children practice making predictions and comparing results, which strengthens scientific reasoning and problem-solving skills.Using cotton swabs also supports fine motor coordination and hand-eye control.Discussing the movements and colors encourages vocabulary development, communication, and an interest in exploring everyday scientific phenomena.
6. Homemade Lava Lamp Experiment
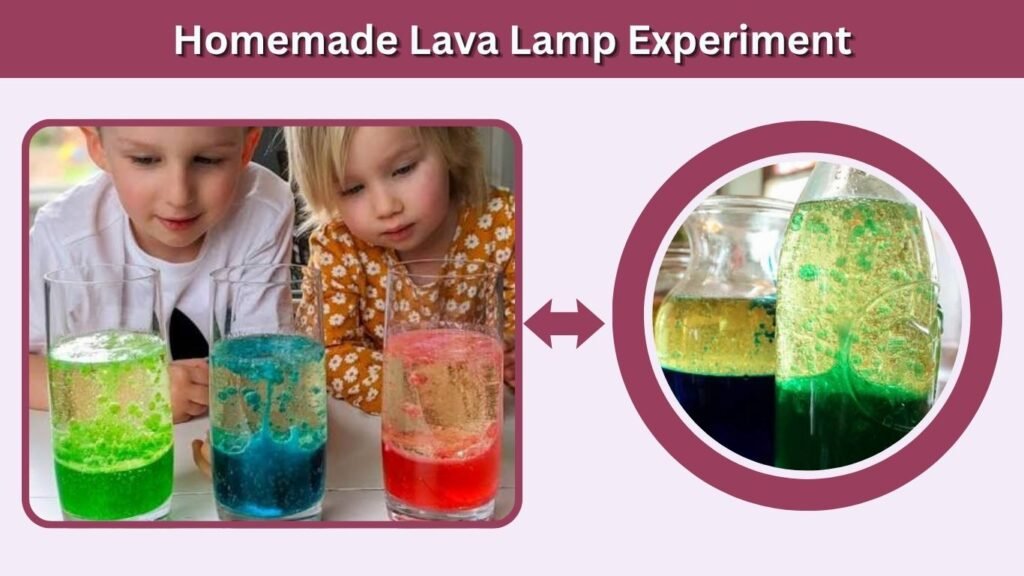
The homemade lava lamp experiment is a colorful and exciting science activity that teaches kids about liquid density, chemical reactions, and gas bubbles. Children combine water, oil, food coloring, and an effervescent tablet to create moving bubbles that resemble a lava lamp. This hands-on experiment encourages curiosity, observation, and scientific thinking while demonstrating how different liquids interact.
Materials Needed
- Vegetable Oil: Creates the upper liquid layer.
- Water: Forms the lower layer of the experiment.
- Food Coloring: Adds bright colors to the moving bubbles.
- Effervescent Tablet: Produces gas bubbles that move through the oil.
- Clear Plastic Bottle: Holds the experiment materials.
- Plastic Tray: Protects the surface from spills.
- Paper and Pencil: Help record observations and results.
How to Make a Homemade Lava Lamp
Start by filling a clear plastic bottle about one-quarter full with water. Slowly add vegetable oil until the bottle is approximately three-quarters full.Allow the liquids to settle into separate layers. Add several drops of food coloring and watch as the coloring moves through the oil and mixes with the water.Ask your child to predict what will happen when the effervescent tablet is added. Drop a small piece of the tablet into the bottle and observe the colorful bubbles rising and falling through the oil.Explain that oil and water do not mix easily. The tablet releases carbon dioxide bubbles that temporarily carry colored water upward before the bubbles escape.
Learning & Development Benefits
This science experiment introduces children to liquid density, chemical reactions, and the behavior of gases.Kids discover why oil floats above water and how gas bubbles can move liquid through different layers.Making predictions and observing changes strengthens critical thinking, concentration, and scientific reasoning.Measuring liquids also supports early mathematical skills, while discussing the colorful movements encourages communication and curiosity about everyday science.
7. Floating Egg Experiment
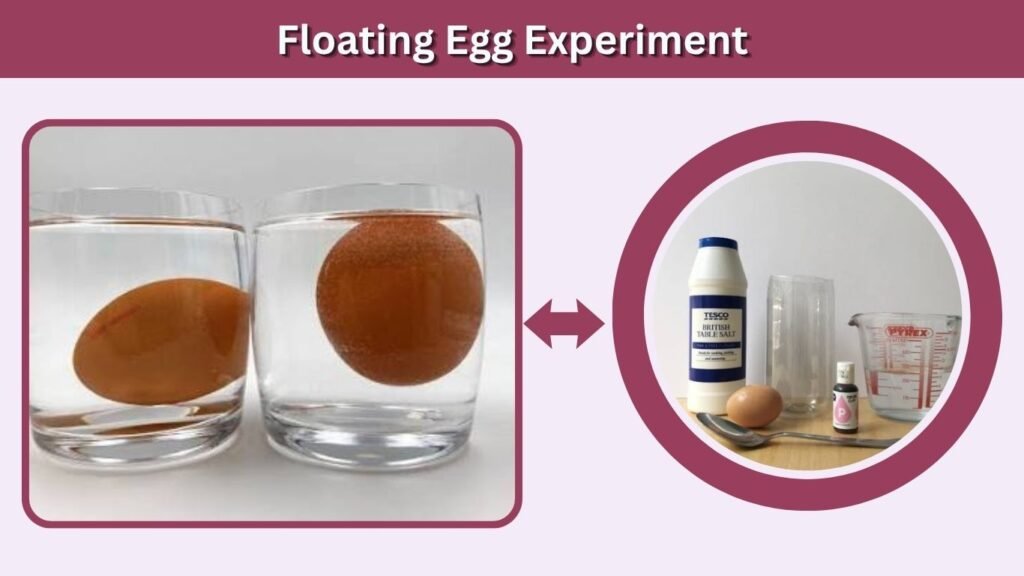
The floating egg experiment is a simple and fascinating science activity that introduces kids to density and buoyancy. Children place eggs in fresh water and salt water to discover how changing the water’s density affects whether an egg sinks or floats. This hands-on experiment encourages observation, prediction, and problem-solving while helping kids understand basic physics concepts using everyday household materials.
Materials Needed
- Raw Eggs: Demonstrate sinking and floating behavior.
- Water: Provides the liquid for testing the eggs.
- Table Salt: Increases the density of water.
- Clear Plastic Cups: Hold fresh water and salt water.
- Plastic Spoon: Helps mix salt into the water.
- Plastic Tray: Collects accidental spills.
- Paper and Pencil: Record predictions and observations.
How to Do the Floating Egg Experiment
Start by filling two clear plastic cups with equal amounts of water. Place the cups on a stable table or plastic tray.Leave the first cup filled with plain water. Add several tablespoons of salt to the second cup, stirring until the salt dissolves.Ask your child to predict what will happen when an egg is placed into each cup.Gently lower one raw egg into the plain water. It will usually sink to the bottom.Place another egg into the salt water and observe whether it floats. If the egg sinks, gradually dissolve more salt and test again.Explain that adding salt increases the water’s density, allowing the egg to float when the salt water becomes denser than the egg.
Learning & Development Benefits
This experiment introduces children to density, buoyancy, and the properties of liquids.Kids learn how adding dissolved salt changes the behavior of objects placed in water.Making predictions and comparing the results develops observation, critical thinking, and scientific reasoning.Measuring and mixing salt supports early mathematical skills, while discussing the experiment encourages curiosity and communication.Children also develop problem-solving abilities by adjusting salt quantities and observing how the results change.
8. Invisible Ink Experiment
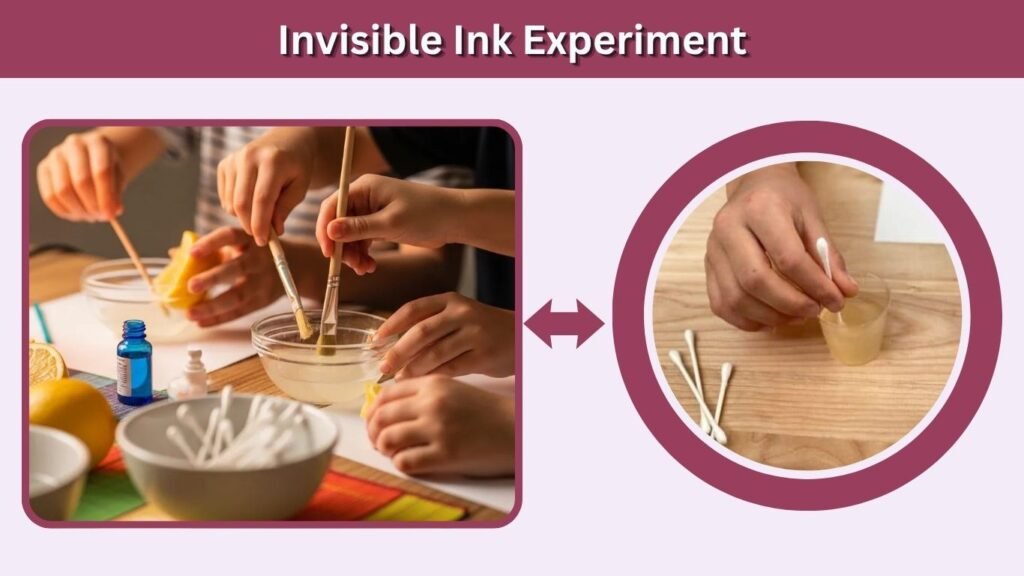
The invisible ink experiment is a fun and creative science activity that teaches kids about chemical changes and oxidation. Children write secret messages using lemon juice and reveal them with gentle heat. This hands-on experiment encourages curiosity, observation, and problem-solving while introducing basic chemistry concepts. It also combines science with creativity, making it an exciting activity for young learners.
Materials Needed
- Lemon Juice: Serves as the invisible ink.
- White Paper: Provides a surface for writing secret messages.
- Cotton Swabs: Help apply lemon juice to the paper.
- Small Bowl: Holds the lemon juice.
- Paintbrush: Offers another way to write messages.
- Warm Iron: Used only by an adult to reveal the writing.
- Paper and Pencil: Help record observations.
How to Do the Invisible Ink Experiment
Start by squeezing a small amount of lemon juice into a bowl. Give your child a cotton swab or paintbrush to dip into the juice.Ask them to write a secret message or draw a simple picture on white paper. Allow the paper to dry completely until the writing becomes difficult to see.Explain that the message can be revealed through a chemical change caused by heating.An adult can place the dried paper between clean sheets of parchment paper and carefully warm it using an iron on a suitable low setting.As the lemon juice residue darkens, the hidden message gradually becomes visible.Encourage children to compare the paper before and after heating and discuss the changes.
Learning & Development Benefits
This experiment introduces children to chemical changes and how heat can affect certain substances.Kids learn that lemon juice contains organic compounds that can darken when heated, revealing previously hidden writing.Creating secret messages encourages imagination, creativity, and fine motor coordination.Observing the changes develops scientific curiosity, concentration, and critical-thinking skills. The activity also strengthens communication as children explain their discoveries.
9. Balloon Static Electricity Experiment
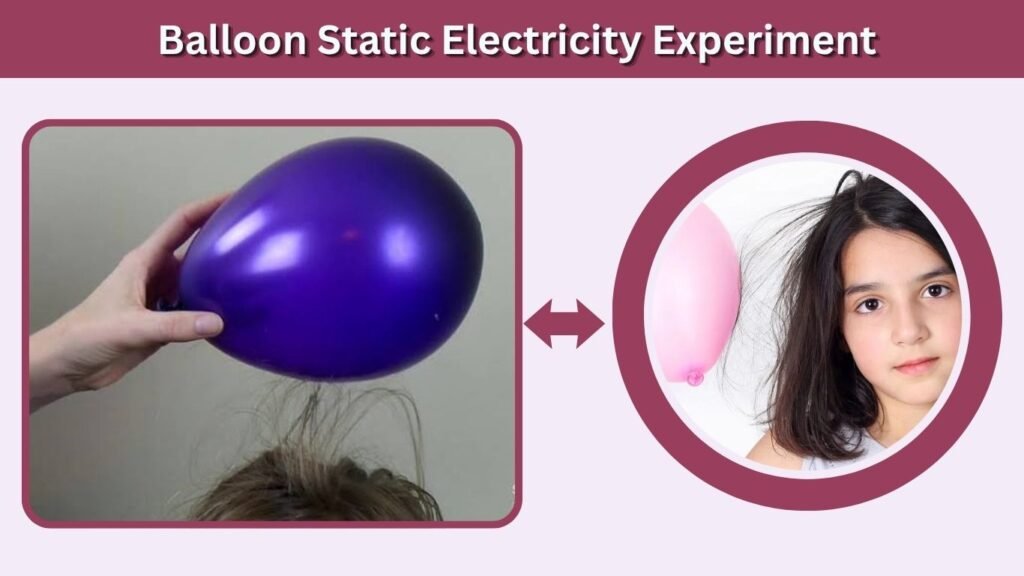
The balloon static electricity experiment is an exciting science activity that introduces kids to electric charges and static electricity. Children rub an inflated balloon against their hair or fabric and observe how it attracts lightweight objects. This simple experiment encourages curiosity, prediction, and scientific observation while helping kids understand how electric charges can create attractive forces without direct contact.
Materials Needed
- Balloon: Generates static electricity when rubbed against suitable materials.
- Wool Fabric: Helps transfer electric charge to the balloon.
- Small Paper Pieces: Demonstrate static attraction.
- Plastic Comb: Provides another object for testing static electricity.
- Dry Cloth: Helps create static charge through rubbing.
- Plastic Tray: Holds the paper pieces during testing.
- Paper and Pencil: Record predictions and experiment results.
How to Do the Balloon Static Electricity Experiment
Start by inflating a balloon and securing its opening with a knot. Place several small pieces of lightweight paper on a dry table or plastic tray.Ask your child to predict what will happen when the balloon moves close to the paper.Rub the balloon against a piece of wool fabric or dry hair for approximately 10–15 seconds.Slowly bring the balloon near the paper pieces without touching them. Watch as some pieces move toward the balloon and may stick to its surface. Explain that rubbing transfers electric charges between materials. The charged balloon can attract nearby neutral objects by rearranging their electric charges.Repeat the experiment using different fabrics and compare the results.
Learning & Development Benefits
This science activity introduces children to static electricity, electric charges, and attractive forces.Kids discover how rubbing certain materials together can create an electrical imbalance that affects nearby lightweight objects.Making predictions and observing the movement of paper strengthens scientific reasoning, concentration, and critical-thinking skills.Comparing different fabrics encourages experimentation and problem-solving. The activity also develops curiosity and helps children connect scientific concepts with everyday experiences.
10. Growing Salt Crystals Experiment
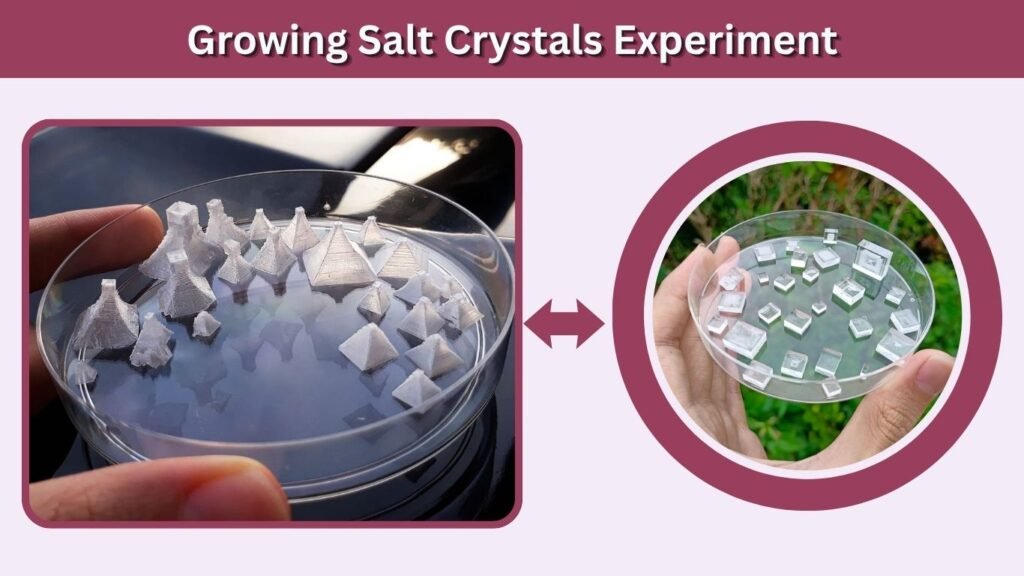
The growing salt crystals experiment is a fun and educational science activity that introduces kids to crystallization, evaporation, and solutions. Children dissolve salt in water and observe how tiny crystals gradually form as the water evaporates. This hands-on experiment encourages patience, curiosity, and scientific observation while helping kids understand how dissolved substances can transform into visible solid structures.
Materials Needed
- Table Salt: Provides the material needed for crystal formation.
- Warm Water: Helps dissolve the salt.
- Clear Container: Holds the saltwater solution.
- Cotton String: Provides a surface for crystal growth.
- Pencil: Supports the string above the container.
- Plastic Spoon: Helps mix salt into the water.
- Paper and Pencil: Record observations and changes.
How to Do the Growing Salt Crystals Experiment
Start by asking an adult to prepare a cup of warm water. Gradually add table salt while stirring until no more salt dissolves easily.Pour the saltwater solution into a clear container. Tie a piece of cotton string around a pencil and suspend the string in the solution without touching the bottom.Place the container in a safe location where it will remain undisturbed. As the water slowly evaporates, small salt crystals may begin forming on the string or around the container. Encourage your child to observe the changes each day and record how the crystals develop. Explain that evaporation leaves dissolved salt behind, allowing it to form solid crystal structures.
Learning & Development Benefits
This science experiment introduces children to crystallization, evaporation, and the properties of dissolved substances. Kids learn how salt dissolves in water and gradually forms visible crystals when water evaporates.Observing crystal growth strengthens patience, concentration, and scientific curiosity.Measuring ingredients and recording daily changes supports mathematical thinking and observation skills. The experiment also encourages children to make predictions, compare results, and understand gradual scientific processes.
11. Lemon Battery Experiment
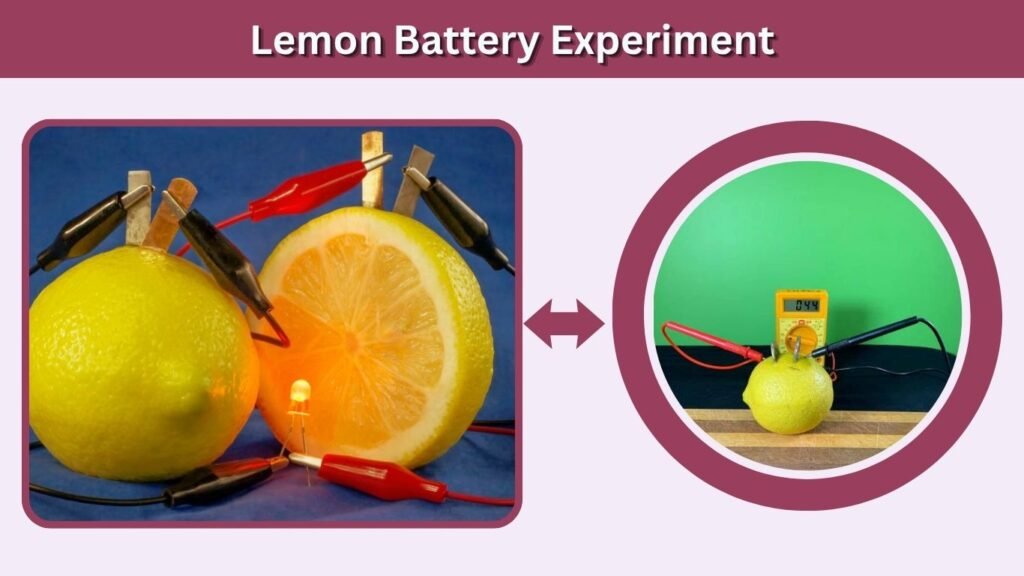
The lemon battery experiment is an exciting science activity that introduces kids to electricity, chemical energy, and simple circuits. Children use lemons and two different metals to create a small battery capable of producing electrical energy. This hands-on experiment encourages curiosity, engineering thinking, and problem-solving while helping kids discover how chemical reactions can generate electricity using everyday materials.
Materials Needed
- Fresh Lemons: Provide the acidic electrolyte for the battery.
- Copper Strips: Serve as one type of electrode.
- Galvanized Nails: Provide zinc-coated electrodes.
- Alligator Clip Wires: Connect the battery components.
- Low-Power LED: Demonstrates electrical output when sufficient voltage and current are available.
- Multimeter: Measures the voltage produced.
- Plastic Tray: Keeps the experiment materials organized.
How to Do the Lemon Battery Experiment
Start by gently rolling several lemons on a table to release some juice inside without breaking their skins.Insert one copper strip and one galvanized nail into each lemon. Keep the metal pieces separated so they do not touch.Connect the copper strip of one lemon to the galvanized nail of the next lemon using an alligator clip wire. Repeat this process to connect several lemons in series.Attach a multimeter to the two remaining free electrodes and observe the voltage reading.Explain that chemical reactions involving the electrodes and lemon juice generate electrical energy.You can also try connecting a suitable low-power LED, although several lemons may be required, and the LED may not light because the battery produces very little current.
Learning & Development Benefits
This experiment introduces children to electricity, simple circuits, and the conversion of chemical energy into electrical energy.Kids discover how different metals and an acidic electrolyte work together to create a small electrical potential.Connecting wires and measuring voltage encourages engineering thinking, observation, and problem-solving skills.Comparing results from different numbers of lemons supports mathematical reasoning. The experiment also helps children understand how batteries work in everyday electronic devices.
12. Pepper and Soap Experiment
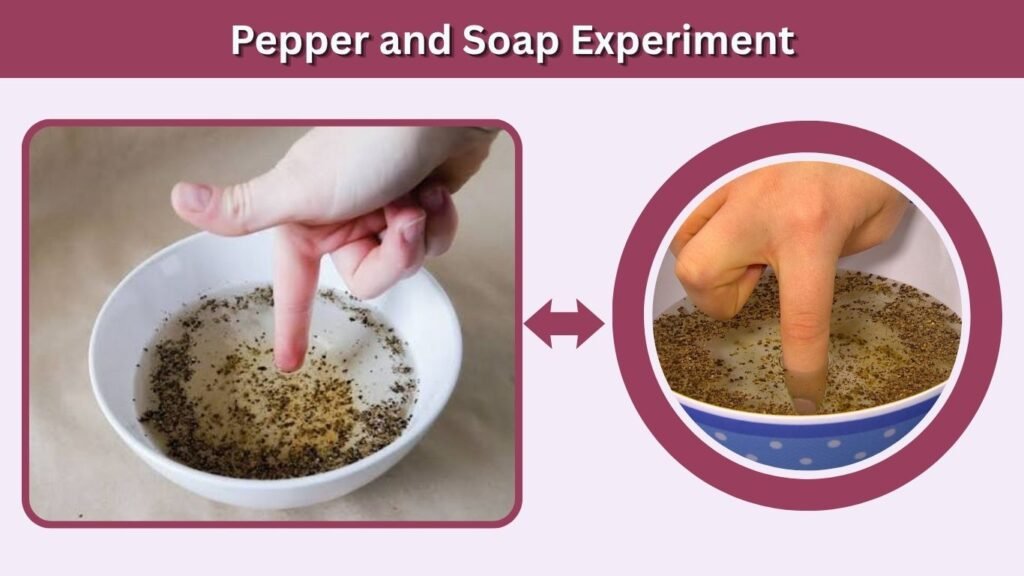
The pepper and soap experiment is a fun and easy science activity that introduces kids to surface tension and the effects of soap on water. Children sprinkle black pepper onto water and watch it quickly move away when dish soap touches the surface. This simple experiment encourages curiosity, observation, and scientific thinking while helping kids understand how soap changes the behavior of water.
Materials Needed
- Black Pepper: Floats on the water and shows surface movement.
- Water: Provides the liquid for the experiment.
- Dish Soap: Reduces the surface tension of water.
- Shallow Plate: Holds the water and pepper.
- Cotton Swabs: Help apply a small amount of soap.
- Plastic Tray: Protects the table from spills.
- Paper and Pencil: Record predictions and observations.
How to Do the Pepper and Soap Experiment
Start by filling a shallow plate with enough water to cover the bottom. Place the plate on a stable table or plastic tray.Sprinkle a small amount of black pepper evenly across the water’s surface. The pepper should remain floating.Ask your child to predict what will happen when soap touches the water. Dip a cotton swab into a small amount of dish soap and gently touch the center of the water. Watch as the pepper quickly moves away from the soap and spreads toward the edges of the plate. Explain that soap reduces the water’s surface tension. The difference in surface tension causes the water to move, carrying the floating pepper along with it.
Learning & Development Benefits
This science activity introduces children to surface tension and how soap changes the behavior of water.Kids develop observation and critical-thinking skills by predicting and watching the pepper’s movement.The experiment encourages curiosity, scientific reasoning, and an understanding of cause-and-effect relationships.Using cotton swabs also supports fine motor coordination and hand-eye control. Discussing the results helps children improve communication skills and explain their scientific discoveries.
13. Water Cycle in a Bag Experiment
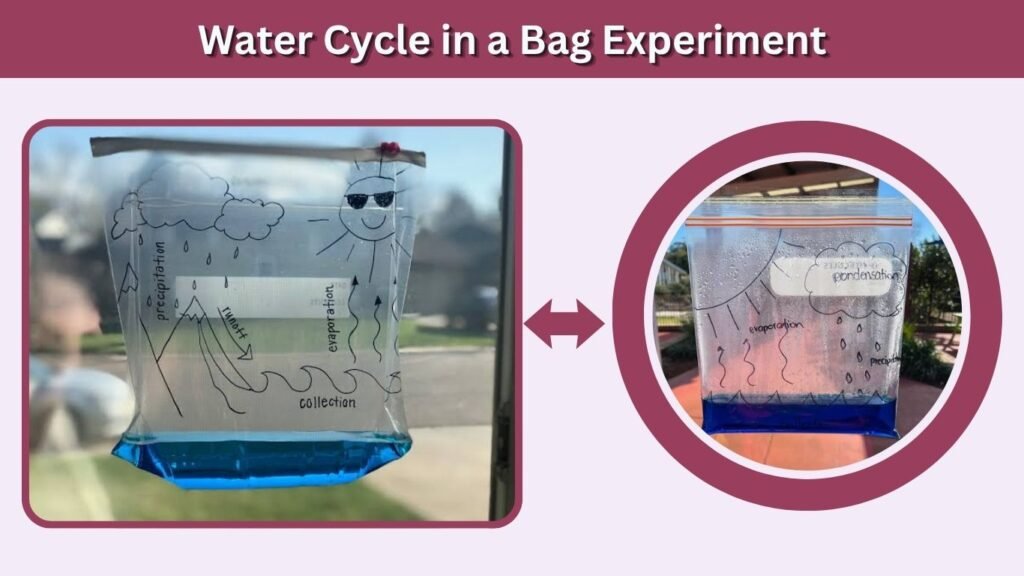
The water cycle in a bag experiment is an educational science activity that teaches kids about evaporation, condensation, and precipitation. Children create a miniature water cycle inside a clear plastic bag and observe how water changes over time. This hands-on experiment encourages curiosity, patience, and scientific observation while helping kids understand how water naturally moves through the environment.
Materials Needed
- Clear Zip-Top Bag: Creates a sealed environment for the experiment.
- Water: Provides the moisture needed for the water cycle.
- Blue Food Coloring: Makes the water easier to observe.
- Permanent Marker: Draws clouds, the sun, and water features.
- Adhesive Tape: Secures the bag to a window.
- Measuring Cup: Helps measure the water.
- Paper and Pencil: Record observations and results.
How to Do the Water Cycle in a Bag Experiment
Start by drawing a sun, clouds, and water waves on the outside of a clear zip-top bag using a permanent marker. Allow the ink to dry completely.Pour a small amount of water into the bag and add one or two drops of blue food coloring.Seal the bag securely and attach it to a sunny window using adhesive tape. Make sure the bag remains upright to prevent leakage.Ask your child to predict what will happen as sunlight warms the water.Over time, some water evaporates and becomes water vapor inside the bag. When the vapor cools against the plastic, it condenses into tiny droplets.As droplets grow larger, they may run down the inside of the bag, demonstrating a simplified version of precipitation.
Learning & Development Benefits
This experiment introduces children to the water cycle, including evaporation, condensation, and precipitation.Kids learn how temperature changes influence the movement and physical state of water.Observing droplets form encourages patience, concentration, and scientific curiosity. Measuring water and recording daily changes supports early mathematical and observation skills. The activity also develops environmental awareness and helps children understand natural weather processes.
14. DIY Rain Cloud in a Jar
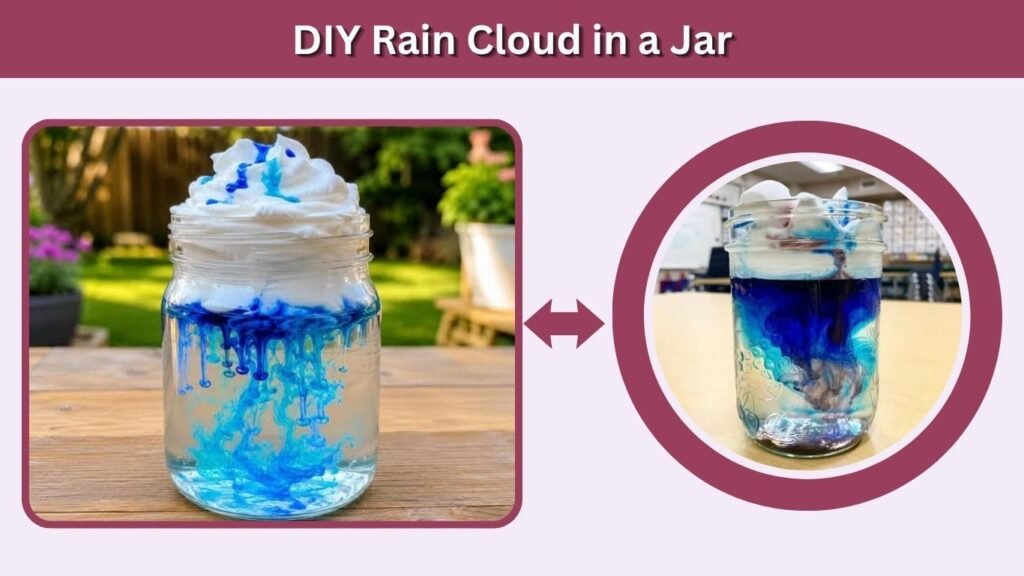
The DIY rain cloud in a jar experiment is a fun and colorful science activity that teaches kids about clouds, rainfall, and water movement. Children use shaving cream, water, and food coloring to create a miniature rain cloud inside a clear container. This hands-on experiment encourages curiosity, observation, and scientific thinking while helping kids understand how rain falls from clouds through a simple visual demonstration.
Materials Needed
- Clear Glass Jar: Holds the water and allows easy observation.
- Water: Represents the atmosphere beneath the cloud.
- Shaving Cream: Creates a fluffy cloud-like layer.
- Blue Food Coloring: Represents falling rain.
- Small Plastic Cup: Holds the colored water.
- Dropper: Helps add colored water slowly.
- Plastic Tray: Protects the work surface from spills.
How to Make a DIY Rain Cloud in a Jar
Start by filling a clear jar about three-quarters full with water. Place the jar on a stable table or plastic tray.Add a thick layer of shaving cream on top of the water to represent a cloud. Make sure the shaving cream covers most of the surface.In a separate cup, mix a few drops of blue food coloring with water.Ask your child to predict what will happen when the colored water is added to the shaving cream.Slowly release drops of colored water onto the shaving cream using a dropper. Watch as the coloring gradually passes through the foam and falls into the water below.Explain that the experiment models rain falling from clouds, although real clouds contain tiny water droplets or ice crystals rather than foam.
Learning & Development Benefits
This science activity introduces children to basic weather concepts, including clouds, rainfall, and precipitation.Kids develop observation and critical-thinking skills by watching how colored water moves through the shaving cream.Making predictions and discussing the results encourages scientific curiosity and problem-solving.Using a dropper also strengthens fine motor coordination and hand-eye control. The experiment helps children connect simple classroom demonstrations with weather events they observe outdoors.
15. Color-Changing Cabbage Water Experiment
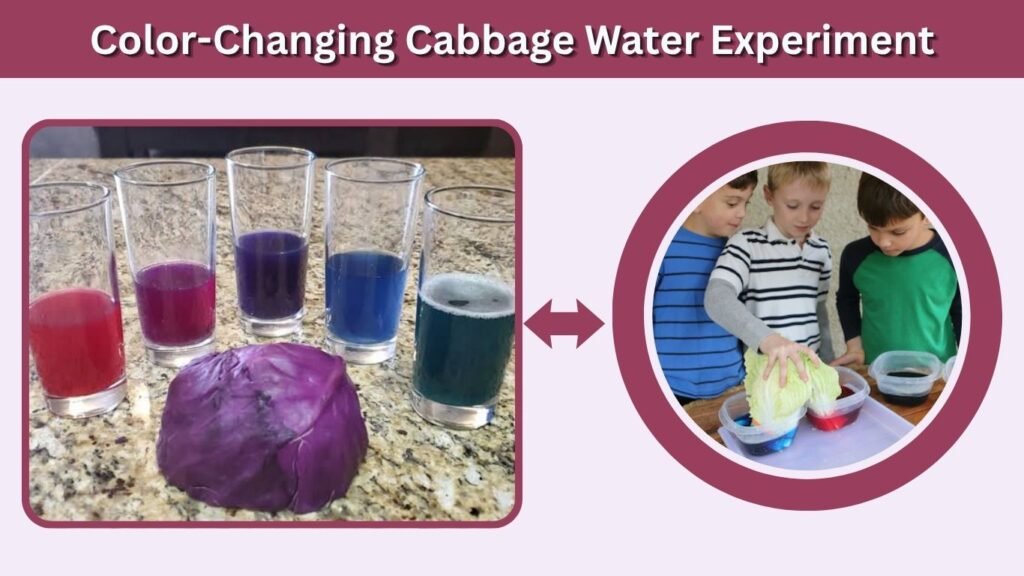
The color-changing cabbage water experiment is an exciting science activity that introduces kids to acids, bases, and natural chemical indicators. Children use purple cabbage water to test different household substances and observe fascinating color changes. This hands-on experiment encourages curiosity, prediction, and scientific observation while demonstrating how natural plant pigments react to different levels of acidity and alkalinity.
Materials Needed
- Red Cabbage: Provides natural pigments that change color.
- Water: Extracts the colorful pigment from the cabbage.
- Clear Plastic Cups: Hold the different test solutions.
- White Vinegar: Provides an acidic substance for testing.
- Baking Soda: Creates a mildly alkaline solution when mixed with water.
- Lemon Juice: Provides another acidic sample.
- Plastic Spoons: Help mix the ingredients.
How to Do the Color-Changing Cabbage Water Experiment
Start by asking an adult to chop several red cabbage leaves into small pieces. Place them in a heat-resistant container and carefully add hot water.Allow the cabbage to soak until the water turns a deep purple color. Let the liquid cool completely, then strain out the cabbage pieces.Pour equal amounts of the purple cabbage water into several clear plastic cups.Add a small amount of vinegar to the first cup, lemon juice to the second, and a baking soda solution to the third.Ask your child to observe the changes. Acidic substances typically turn the cabbage water pink or reddish, while alkaline substances may turn it blue or green.Explain that cabbage contains natural pigments called anthocyanins, which change color depending on the acidity or alkalinity of a solution.
Learning & Development Benefits
This experiment introduces children to basic chemistry concepts, including acids, bases, and pH indicators.Kids discover how natural plant pigments can change color when mixed with different household substances.Making predictions and comparing color changes strengthens observation, critical thinking, and scientific reasoning.Measuring liquids and organizing results encourages early mathematical and classification skills. The activity also promotes curiosity about plants, chemistry, and everyday scientific reactions.
FAQs
1. What Are the Best Easy Science Activities for Kids?
Some of the best easy science activities for kids include baking soda volcanoes, rainbow walking water, sink-or-float experiments, magic milk, and homemade lava lamps. These hands-on experiments use simple household materials and help children explore basic scientific concepts while developing curiosity and problem-solving skills.
2. What Age Can Kids Start Doing Simple Science Experiments?
Children can begin participating in simple, age-appropriate science activities around ages 3–4 with adult supervision. Younger kids can explore color mixing, floating objects, and water experiments, while older children can try crystal growing, lemon batteries, and other activities involving more advanced scientific concepts.
3. How Can I Make Science Activities Fun for Kids at Home?
Make science activities enjoyable by using colorful materials, interactive demonstrations, and familiar household objects. Encourage kids to ask questions, predict results, and explore different outcomes. Simple experiments involving bubbles, water, colors, and movement can make learning exciting while developing scientific curiosity and creative thinking.
4. What Skills Do Science Activities Help Kids Develop?
Science activities help children develop critical thinking, observation, problem-solving, and logical reasoning skills. Hands-on experiments also strengthen fine motor coordination, concentration, and creativity. Making predictions, measuring ingredients, and comparing results encourages early mathematical understanding and improves communication skills.
5. Can Kids Do Science Experiments Without Expensive Materials?
Yes, many easy science experiments require only inexpensive household materials such as water, vinegar, baking soda, salt, food coloring, and paper towels. Activities like floating eggs, pepper and soap experiments, and rainbow walking water provide valuable learning experiences without specialized science equipment. Adult supervision ensures safe participation.
