

Looking for fun ways to spark your child’s imagination and creativity? These 27 best creative activities for kids offer exciting opportunities for learning, exploration, and hands-on fun. From colorful painting and DIY paper crafts to storytelling and imaginative building projects, these activities encourage artistic expression and problem-solving skills. Whether indoors or outdoors, discover simple, affordable ideas to keep your kids entertained, inspired, and creatively engaged.
1. DIY Paper Craft Making

DIY paper craft making is one of the best creative activities for kids, offering endless opportunities to explore imagination and artistic skills. Children can transform simple sheets of paper into colorful flowers, animals, greeting cards, and decorative objects. This affordable indoor activity encourages hands-on learning, creativity, and concentration while keeping kids entertained. Whether crafting independently or working with family members, paper crafts provide an enjoyable way to create unique artwork using everyday materials.
Materials Needed
- Colored Paper: Bright construction paper for creating different shapes and decorations.
- Safety Scissors: Child-friendly scissors for cutting paper safely.
- Glue Sticks: Non-toxic glue for attaching paper pieces.
- Pencils: Useful for sketching designs before cutting.
- Markers and Crayons: For adding colors, patterns, and decorative details.
- Stickers: Fun accessories for personalizing craft projects.
- Cardboard: Recycled cardboard for creating sturdy craft structures.
- Craft Templates: Printable patterns for making animals, flowers, and other designs.
How to Make DIY Paper Crafts
Start by choosing a simple craft project based on your child’s age and interests. Paper flowers, colorful butterflies, and handmade greeting cards are excellent options for beginners.Provide children with colored paper and encourage them to draw different shapes using pencils. Help younger kids cut out the shapes with safety scissors and arrange them into creative designs.Children can glue the pieces together to create animals, decorative flowers, or imaginative characters. Older kids may enjoy more detailed projects such as paper houses, three-dimensional sculptures, or layered artwork.Allow children to experiment with colors, shapes, and textures rather than following strict instructions. Display their completed crafts to celebrate their creativity and efforts.
Learning and Development Benefits
Paper craft activities help children develop fine motor skills, hand-eye coordination, and concentration. Folding, cutting, and gluing paper strengthen finger control and encourage precise movements.Creating different shapes introduces early mathematical concepts such as symmetry, patterns, and spatial relationships. Children also develop problem-solving abilities as they plan and assemble their designs.Crafting encourages imagination, self-expression, and confidence. Working together on creative projects promotes communication, cooperation, and patience.
2. Finger Painting

Finger painting is one of the most enjoyable creative activities for kids, allowing children to explore colors, textures, and artistic expression using their hands. This hands-on activity encourages imagination, sensory development, and creativity while providing an exciting alternative to traditional painting methods. Kids can create colorful patterns, animals, flowers, and abstract artwork without needing advanced drawing skills. Whether painting independently or participating in group projects, finger painting offers an entertaining and educational experience for children of different ages.
Materials Needed
- Washable Finger Paints: Non-toxic, child-safe paints available in different colors.
- Large Paper Sheets: Thick drawing paper or poster boards for creating colorful artwork.
- Plastic Paint Trays: Shallow containers for holding different paint colors.
- Protective Aprons: Old shirts or washable aprons to protect children’s clothing.
- Table Cover: A reusable plastic sheet or newspaper to protect furniture.
- Wet Wipes: Useful for cleaning hands during painting activities.
- Paintbrushes: Optional tools for adding details to finger-painted designs.
- Sponges: Soft sponges for experimenting with different painting textures.
How to Enjoy Finger Painting
Start by covering a table with a protective sheet and arranging large pieces of paper in front of the children. Pour small amounts of washable finger paint into separate trays to make the colors easy to access.Encourage kids to dip their fingers into the paint and create simple patterns, lines, and shapes. Younger children can enjoy making colorful handprints, while older kids may prefer painting animals, flowers, or imaginative landscapes.Introduce color-mixing activities by allowing children to combine two different shades and observe the results. They can also use their fingertips to create dots, swirls, and interesting textures.Allow children to experiment freely without focusing on creating perfect pictures. Display their finished artwork after the paint has dried completely.
Learning and Development Benefits
Finger painting helps children develop fine motor skills, hand-eye coordination, and sensory awareness. Moving their fingers across paper strengthens hand muscles and encourages controlled movements.Exploring different colors and textures introduces basic artistic concepts and supports early cognitive development. Mixing colors encourages experimentation, observation, and problem-solving.This activity also promotes imagination, creativity, and emotional expression. Children can communicate ideas through artwork while developing confidence in their abilities.Group painting sessions encourage cooperation, sharing, and communication as children create artwork together.
3. Homemade Playdough Sculpting

Homemade playdough sculpting is a fun and imaginative creative activity that allows kids to transform soft dough into colorful shapes, animals, and miniature objects. This affordable indoor activity combines hands-on exploration with artistic expression, making it suitable for children who enjoy building and designing. Using simple household ingredients, families can prepare homemade playdough and encourage kids to experiment with different sculptures. Whether creating pretend food, flowers, or imaginative characters, playdough sculpting provides hours of engaging entertainment.
Materials Needed
- All-Purpose Flour: The main ingredient for creating homemade playdough.
- Salt: Helps improve the dough’s texture and consistency.
- Water: Used to combine the dry ingredients into a soft mixture.
- Vegetable Oil: Adds flexibility and helps prevent the dough from becoming too dry.
- Food Coloring: Optional coloring for creating bright, attractive playdough.
- Mixing Bowl: A large container for combining ingredients.
- Rolling Pin: A small rolling pin for flattening and shaping dough.
- Cookie Cutters: Plastic cutters for creating stars, animals, and geometric shapes.
- Plastic Sculpting Tools: Child-friendly tools for adding details to creations.
How to Make Homemade Playdough Sculptures
Start by preparing a simple no-cook playdough mixture using approximately two cups of flour, half a cup of salt, two tablespoons of vegetable oil, and enough water to form a smooth dough.Mix the ingredients gradually in a large bowl and knead until the dough becomes soft and manageable. Divide the mixture into smaller portions and add a few drops of food coloring to create different colors.Give children small pieces of playdough and encourage them to roll, flatten, twist, and shape the material. Younger kids can make simple balls, snakes, and stars, while older children may enjoy sculpting animals, flowers, or miniature buildings.Introduce cookie cutters and plastic tools to help children create additional textures and decorative details.Allow kids to experiment with imaginative designs and combine different colors to create unique sculptures.
Learning and Development Benefits
Homemade playdough sculpting helps children strengthen fine motor skills and hand muscles through squeezing, rolling, pinching, and shaping movements.Creating different objects encourages spatial awareness, problem-solving, and creativity. Children learn to recognize shapes, compare sizes, and explore basic three-dimensional structures.Playdough activities also support sensory development as children experience different textures and experiment with the material’s flexibility.Group sculpting encourages communication, cooperation, and imaginative storytelling. Completing creative projects can strengthen confidence and provide a sense of accomplishment.
4. Nature Collage Art
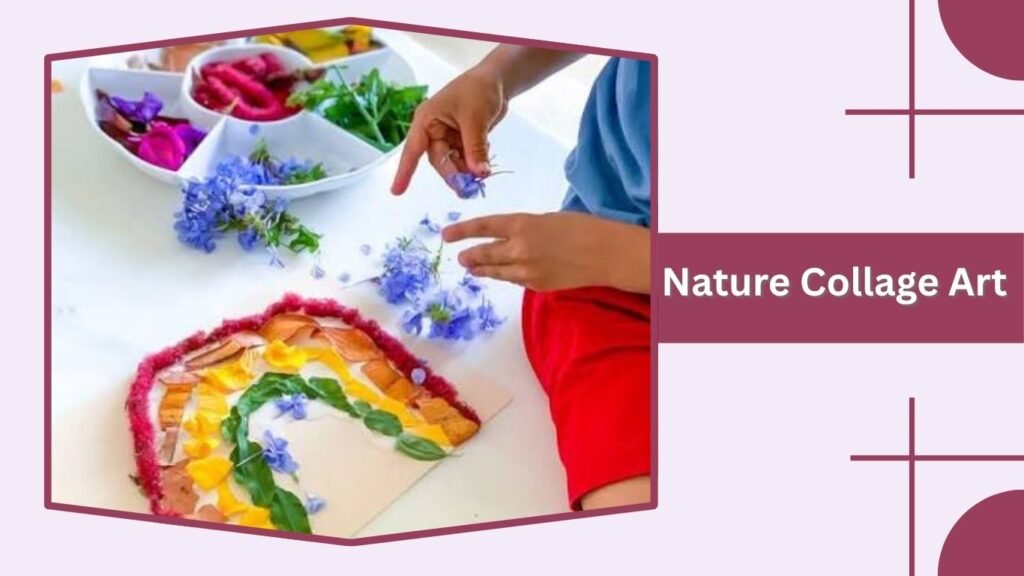
Nature collage art is one of the most engaging creative activities for kids, combining outdoor exploration with hands-on artistic expression. Children can collect leaves, flowers, twigs, and other natural materials to create beautiful pictures, patterns, and decorative artwork. This affordable activity encourages imagination, observation, and an appreciation for nature while developing important creative skills. Whether making colorful landscape collages or imaginative animal designs, kids can enjoy transforming everyday natural objects into unique artistic creations.
Materials Needed
- Fallen Leaves: Colorful leaves in different shapes and sizes for creating natural patterns.
- Flower Petals: Dried or freshly fallen petals for adding color and texture.
- Small Twigs: Lightweight twigs for creating outlines, trees, and decorative details.
- Cardboard: Recycled cardboard or thick paper for supporting collage materials.
- Glue Sticks: Child-safe glue for attaching lightweight natural objects.
- Safety Scissors: Blunt-tip scissors for trimming paper and suitable materials.
- Colored Pencils: Useful for drawing backgrounds and adding artistic details.
- Small Containers: Bowls or trays for organizing collected natural materials.
How to Make Nature Collage Art
Start by taking children on a short nature walk through a backyard, garden, or local park. Encourage them to collect suitable fallen leaves, petals, and small twigs without damaging living plants.Once the materials are gathered, arrange them on a clean table and provide each child with a piece of cardboard or thick drawing paper.Ask children to imagine a picture they would like to create. They can arrange leaves into butterfly wings, use twigs to form tree branches, or combine flower petals into colorful landscapes.Encourage kids to experiment with different arrangements before gluing the materials onto their paper. They can also use colored pencils to add backgrounds, animals, or other imaginative details.Allow the completed artwork to dry before displaying it around the home.
Learning and Development Benefits
Nature collage art helps children strengthen fine motor skills, hand-eye coordination, and concentration. Picking up small natural objects and arranging them into patterns encourages precise hand movements.Exploring leaves, flowers, and twigs introduces children to different textures, colors, shapes, and natural materials. This supports observation skills and environmental awareness.Creating unique designs encourages imagination, problem-solving, and artistic expression. Children learn to combine different materials while experimenting with patterns and composition.Group collage activities also promote cooperation, sharing, and communication as children exchange ideas and materials.
5. DIY Puppet Making

DIY puppet making is a fun and imaginative creative activity that allows kids to design colorful characters using simple household materials. Children can transform paper bags, old socks, cardboard, and craft supplies into animals, storybook characters, and funny imaginary creatures. This affordable indoor activity combines artistic expression with storytelling and pretend play. Whether creating a friendly animal puppet or organizing a miniature puppet show, kids can enjoy developing their creativity while learning valuable communication and problem-solving skills.
Materials Needed
- Paper Bags: Small paper lunch bags for creating simple hand puppets.
- Old Socks: Clean, unused or washed socks for making soft puppet characters.
- Colored Paper: Construction paper for creating ears, noses, clothing, and decorations.
- Glue Sticks: Non-toxic adhesive for attaching lightweight craft materials.
- Safety Scissors: Child-friendly scissors for cutting paper shapes.
- Markers and Crayons: Useful for drawing faces and decorative patterns.
- Yarn: Short pieces of colorful yarn for creating puppet hair.
- Fabric Scraps: Small pieces of clean fabric for adding costumes and accessories.
- Cardboard Boxes: Recycled boxes for constructing a simple puppet theater.
How to Make DIY Puppets
Start by helping children choose the type of puppet they want to create. Paper bag puppets are excellent for beginners, while sock puppets provide additional opportunities for imaginative designs.For a paper bag puppet, place the bag flat with its folded bottom facing upward. Encourage children to draw eyes, a nose, and a mouth on the appropriate sections.Cut out paper ears, hats, or other decorations using safety scissors. Attach the pieces with glue and allow the puppet to dry completely.For a sock puppet, children can decorate a clean sock using fabric pieces, yarn, and suitable craft accessories. Adults should assist with any sewing or strong adhesives.Once the puppets are finished, encourage children to invent characters, create dialogue, and perform a short puppet show using a cardboard theater.
Learning and Development Benefits
DIY puppet making helps children develop fine motor skills, hand-eye coordination, and artistic creativity. Cutting, drawing, and attaching decorations encourage careful movements and concentration.Creating puppet characters supports imagination, storytelling, and language development. Children practice expressing emotions, developing conversations, and organizing ideas into simple stories.Puppet performances can also build confidence and strengthen communication skills. Shy children may find it easier to express thoughts and feelings through imaginary characters.Group puppet-making activities encourage cooperation, patience, and teamwork as children share materials and create performances together.
6. Creative Story Writing
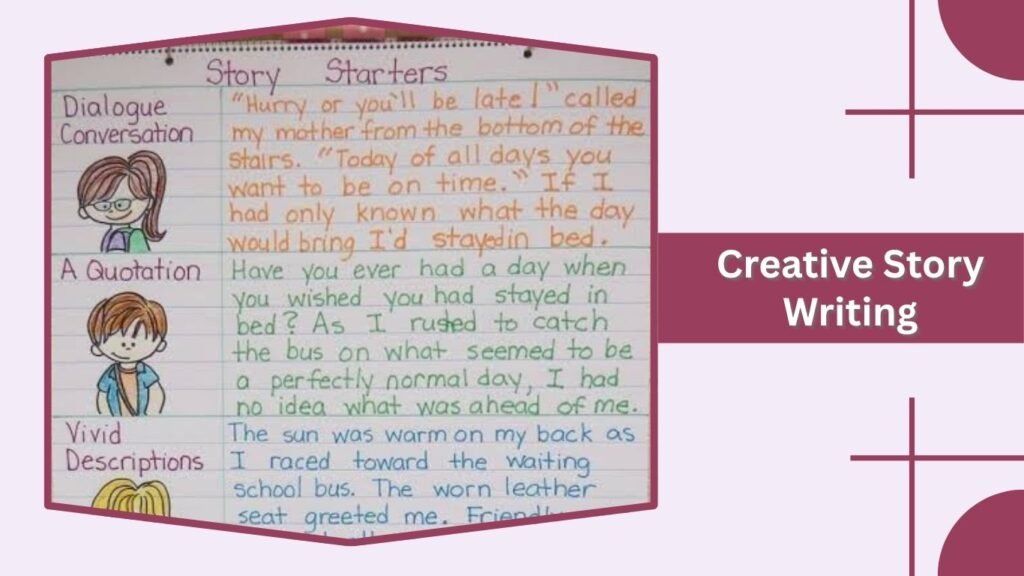
Creative story writing is one of the most engaging creative activities for kids, allowing children to explore their imagination while developing important language and communication skills. Kids can invent exciting adventures, create imaginary characters, and build unique fictional worlds using simple writing materials. This affordable indoor activity encourages self-expression, critical thinking, and storytelling abilities. Whether writing short fairy tales, animal adventures, or superhero stories, children can enjoy transforming their creative ideas into entertaining written stories.
Materials Needed
- Blank Notebooks: Simple notebooks for writing original stories and recording creative ideas.
- Pencils and Pens: Comfortable writing tools suitable for children’s ages.
- Colored Pencils: Useful for illustrating characters and decorating story pages.
- Story Prompt Cards: Picture cards featuring characters, locations, and imaginary situations.
- Writing Worksheets: Printable templates for organizing story beginnings, middles, and endings.
- Stickers: Decorative accessories for personalizing storybooks.
- Drawing Paper: Extra sheets for sketching imaginary worlds and story characters.
- Storybooks: Age-appropriate books for inspiration and exploring different storytelling styles.
How to Enjoy Creative Story Writing
Start by encouraging children to choose a story theme that interests them. Popular options include magical adventures, talking animals, mysterious islands, and imaginary superheroes. Help kids create a main character by choosing a name, personality, and special abilities. Next, ask them to imagine a setting where the story takes place and think about an interesting problem their character must solve.Younger children can draw pictures and describe their stories aloud while an adult writes down their words. Older kids can write short paragraphs and organize their ideas into a beginning, middle, and ending.Encourage children to add conversations, surprising events, and creative descriptions. Once the story is complete, they can illustrate important scenes and design a colorful cover.Allow kids to share their finished stories with family members or friends.
Learning and Development Benefits
Creative story writing helps children develop vocabulary, spelling, sentence construction, and communication skills. Organizing ideas into stories strengthens logical thinking, memory, and sequencing abilities.Creating characters and imaginary situations encourages creativity, imagination, and problem-solving. Children learn to explore different perspectives and express emotions through fictional experiences.Writing regularly can improve concentration, patience, and confidence. Illustrating stories also supports fine motor development and artistic expression.Group storytelling activities promote cooperation, listening skills, and respect for different ideas.
7. Cardboard Box Creations

Cardboard box creations are a fun and affordable creative activity that encourages kids to transform ordinary household packaging into imaginative structures, toys, and decorations. Children can use recycled cardboard boxes to build miniature houses, castles, rockets, cars, and pretend shops. This hands-on activity combines artistic expression with construction and imaginative play. Whether working independently or collaborating with friends, kids can enjoy turning simple recycled materials into exciting projects while developing creativity and problem-solving skills.
Materials Needed
- Cardboard Boxes: Clean, sturdy boxes in different sizes for creating structures and models.
- Colored Paper: Construction paper for decorating cardboard creations.
- Safety Scissors: Child-friendly scissors for cutting lightweight cardboard and paper.
- Glue Sticks: Non-toxic adhesive for attaching decorations and craft materials.
- Painter’s Tape: Useful for joining lightweight cardboard pieces.
- Markers and Crayons: For drawing windows, doors, patterns, and decorative details.
- Paint: Washable, child-safe paint for adding colorful finishes.
- Stickers: Fun decorations for personalizing cardboard projects.
- Fabric Scraps: Lightweight materials for making curtains, flags, and decorative accessories.
How to Make Cardboard Box Creations
Start by collecting clean cardboard boxes from household deliveries or packaging. Remove staples, sharp fasteners, and unnecessary plastic materials before allowing children to begin crafting.Encourage kids to choose a creative project based on their interests. A large cardboard box can become a pretend rocket ship, while smaller boxes can be transformed into miniature houses, cars, or castles.Help children plan their designs by drawing simple outlines on the cardboard. Adults can cut doors, windows, and other openings using appropriate tools.Once the basic structure is ready, allow kids to decorate their creations with colored paper, paint, markers, and stickers. They can add imaginative details such as colorful doors, pretend control panels, or decorative flags.Encourage children to use their finished creations for storytelling and pretend-play adventures.
Learning and Development Benefits
Cardboard box creations help children develop creativity, spatial awareness, and problem-solving skills. Planning and assembling three-dimensional structures introduces basic engineering concepts, including balance, stability, and construction.Drawing, folding, and attaching cardboard pieces strengthen fine motor skills and hand-eye coordination. Children also learn to recognize shapes, compare sizes, and experiment with different materials.Pretend play encourages imagination, language development, and social interaction. Creating imaginary houses, vehicles, or shops allows children to explore different roles and situations.Working on group projects promotes cooperation, communication, patience, and teamwork.
8. Rock Painting

Rock painting is one of the most enjoyable creative activities for kids, allowing children to transform ordinary stones into colorful artwork and decorative objects. Kids can paint animals, flowers, cartoon characters, and imaginative patterns on smooth rocks using simple art supplies. This affordable activity encourages artistic expression, concentration, and hands-on exploration. Whether creating painted garden decorations or personalized gifts, rock painting provides an entertaining way for children to explore colors, textures, and designs while developing their creativity.
Materials Needed
- Smooth Rocks: Clean, flat stones with smooth surfaces for easy painting.
- Washable Paints: Non-toxic acrylic-style craft paints suitable for children’s projects.
- Paintbrushes: Small and medium-sized brushes for creating different designs.
- Paint Trays: Plastic palettes or shallow containers for holding paint colors.
- Pencils: Useful for sketching simple patterns before painting.
- Markers: Child-safe paint markers for adding outlines and decorative details.
- Paper Towels: Helpful for cleaning brushes and removing excess paint.
- Protective Table Cover: Newspaper or reusable sheets for preventing paint stains.
- Clear Sealer: Optional outdoor protective coating applied by adults when appropriate.
How to Enjoy Rock Painting
Start by collecting smooth, medium-sized rocks from a safe outdoor location or purchasing suitable craft stones. Wash the rocks thoroughly to remove dirt and allow them to dry completely.Arrange the painting materials on a protected table and encourage children to choose their favorite designs. Younger kids can begin with simple dots, stripes, and colorful patterns, while older children may enjoy painting animals, flowers, or imaginative characters.Help children sketch their ideas lightly with a pencil before applying paint. Encourage them to use different brush sizes and experiment with color combinations.Once the first layer of paint dries, children can add smaller details such as eyes, outlines, or decorative shapes. Allow the finished rocks to dry completely before displaying them.Painted rocks can become colorful garden decorations, personalized gifts, or creative additions to indoor displays.
Learning and Development Benefits
Rock painting helps children develop fine motor skills, hand-eye coordination, and concentration. Holding paintbrushes and creating small designs strengthens finger control and encourages precise movements.Experimenting with colors, shapes, and patterns supports artistic development and creative thinking. Children learn how different colors interact while exploring textures and surface designs.This activity also encourages patience and problem-solving as kids plan their artwork and complete detailed patterns.Group rock painting sessions promote communication, cooperation, and sharing. Completing a personalized painted rock can build confidence and provide children with a sense of accomplishment.
9. Homemade Musical Instruments

Homemade musical instruments are exciting creative activities for kids that combine crafting, music, and imaginative play. Children can transform everyday household materials into simple drums, shakers, guitars, and rhythm instruments while exploring different sounds. This affordable indoor activity encourages artistic expression, experimentation, and hands-on learning. Whether creating a homemade band or organizing a family music performance, kids can enjoy discovering rhythm, sound, and musical creativity through simple DIY projects.
Materials Needed
- Empty Plastic Bottles: Clean containers for creating homemade shakers.
- Dried Rice or Beans: Materials for producing rattling sounds inside sealed containers.
- Cardboard Boxes: Useful for building pretend guitars and simple percussion instruments.
- Paper Plates: Lightweight materials for creating tambourine-style crafts.
- Wooden Spoons: Suitable for tapping sturdy homemade drum surfaces.
- Rubber Bands: Adult-supervised materials for making string-based instruments.
- Colored Paper: Decorative paper for personalizing musical creations.
- Glue and Tape: Child-safe adhesives for assembling lightweight components.
- Markers and Stickers: For adding colorful designs and decorations.
How to Make Homemade Musical Instruments
Start by selecting a simple musical instrument that matches your child’s age and interests. Homemade shakers and cardboard drums are excellent choices for beginners.To create a shaker, place a small amount of dried rice or beans inside a clean plastic bottle. Secure the cap firmly and reinforce the closure so children cannot open it. Encourage kids to decorate the outside using colored paper, markers, and stickers.For a homemade drum, use a sturdy cardboard container and allow children to tap its surface gently with their hands or suitable lightweight tools.Older children can experiment with a simple cardboard guitar using rubber bands stretched around a reinforced opening, with adult assistance.
Learning and Development Benefits
Making homemade musical instruments helps children develop fine motor skills, hand-eye coordination, and creativity. Decorating and assembling instruments encourages precise movements and problem-solving.Exploring different sounds introduces basic musical concepts such as rhythm, tempo, pitch, and volume. Children discover how different materials produce unique sounds when shaken, tapped, or plucked.Playing instruments also supports listening skills, concentration, and auditory awareness. Following simple rhythms can strengthen memory and coordination.Group music activities encourage communication, cooperation, and self-expression. Children gain confidence as they create rhythms and participate in imaginative musical performances.
10. DIY Friendship Bracelets

DIY friendship bracelets are one of the most enjoyable creative activities for kids, allowing children to design colorful handmade accessories while expressing their personalities. Using embroidery threads, colorful cords, and simple knotting techniques, kids can create unique bracelets to wear or share with friends. This affordable indoor activity encourages creativity, patience, and concentration while developing essential crafting skills. Whether making matching bracelets or experimenting with decorative patterns, children can enjoy creating meaningful handmade gifts for their loved ones.
Materials Needed
- Embroidery Floss: Colorful cotton threads for creating different bracelet patterns.
- Craft Cords: Soft, flexible cords suitable for children’s bracelet-making projects.
- Safety Scissors: Child-friendly scissors for cutting threads to the desired length.
- Tape: Useful for securing bracelet threads to a table while working.
- Clipboard: A flat surface for keeping threads organized during knotting.
- Colorful Beads: Optional decorations for older children who can safely handle small materials.
- Measuring Tape: Helpful for determining the correct bracelet length.
- Pattern Templates: Simple printable designs for creating stripes, chevrons, and other patterns.
How to Make DIY Friendship Bracelets
Start by helping children select three or four embroidery thread colors that complement one another. Cut the threads into equal lengths and tie them together with a simple knot at one end.Secure the knotted end to a table using tape or attach it to a clipboard. Encourage younger children to begin with basic braided bracelets by dividing the threads into three sections.Show kids how to cross the outer threads over the middle section repeatedly to create a colorful braid. Older children can experiment with basic knotting techniques to design striped or chevron patterns.Once the bracelet reaches the desired length, tie a secure finishing knot and trim the excess thread. Children can exchange their completed bracelets with friends or create matching accessories for family members.
Learning and Development Benefits
Making friendship bracelets helps children develop fine motor skills, hand-eye coordination, and concentration. Threading, braiding, and knotting encourage precise finger movements and strengthen coordination.Following bracelet patterns introduces mathematical concepts such as sequencing, repetition, and symmetry. Children also practice problem-solving when adjusting colors or correcting knotting mistakes.The activity encourages patience, creativity, and artistic expression. Designing personalized bracelets allows kids to explore different color combinations and decorative styles.Sharing handmade bracelets promotes friendship, kindness, and social interaction while helping children develop confidence in their creative abilities.
11. Watercolor Painting
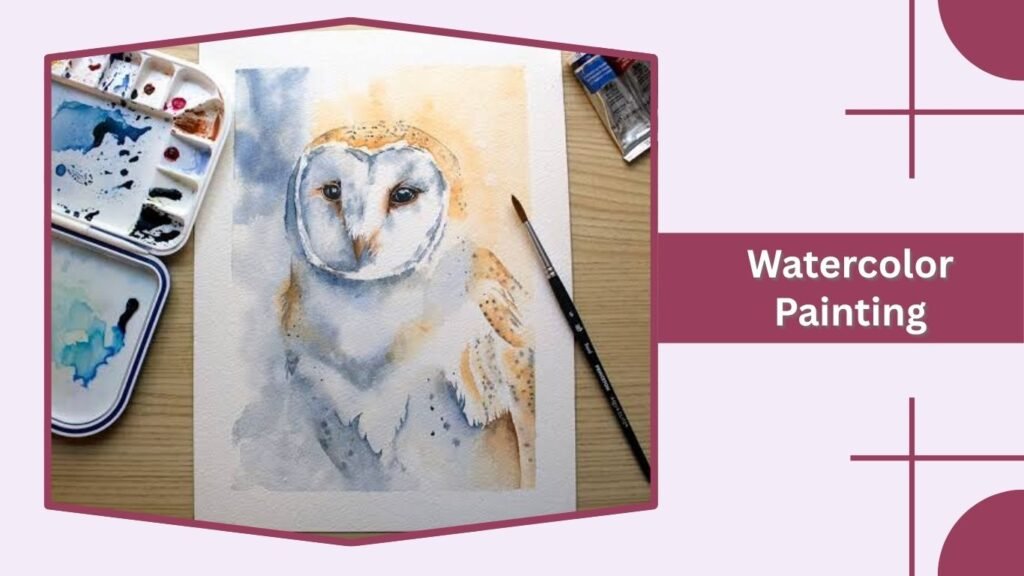
Watercolor painting is a fun and relaxing creative activity for kids that encourages artistic exploration through colorful designs and gentle brushstrokes. Children can experiment with mixing colors, creating soft backgrounds, and painting imaginative pictures using water-based paints. This affordable indoor activity helps develop creativity, concentration, and fine motor coordination while providing opportunities for self-expression. Whether painting flowers, animals, landscapes, or abstract patterns, watercolor painting allows kids to discover different artistic techniques in an enjoyable environment.
Materials Needed
- Watercolor Paints: Non-toxic, child-safe watercolor sets available in different colors.
- Watercolor Paper: Thick paper designed to absorb water without tearing easily.
- Paintbrushes: Soft brushes in different sizes for creating various painting effects.
- Water Cups: Small, stable containers for rinsing brushes and mixing colors.
- Paint Palette: A plastic palette for blending different watercolor shades.
- Pencils: Useful for sketching simple designs before painting.
- Paper Towels: Helpful for absorbing excess water and cleaning paintbrushes.
- Protective Table Cover: Newspaper or reusable plastic sheets to protect furniture.
- Aprons: Washable aprons or old shirts for protecting children’s clothing.
How to Enjoy Watercolor Painting
Start by preparing a clean painting area and arranging watercolor paints, brushes, paper, and water containers within easy reach. Encourage children to choose a simple subject such as flowers, butterflies, trees, or colorful landscapes.Help younger kids dip their brushes into water before gently touching the watercolor paints. Explain how adding more water creates lighter colors, while using less water produces stronger shades.Encourage children to experiment with basic techniques such as painting broad strokes, creating colorful dots, and blending two colors together.Older children can sketch simple outlines with pencils before adding watercolor details. They may also enjoy experimenting with wet-on-wet painting by applying colors to slightly damp paper.Allow kids to explore different painting styles without expecting perfect results. Once the paintings are complete, place them on a flat surface to dry before displaying their artwork.
Learning and Development Benefits
Watercolor painting helps children improve fine motor skills, hand-eye coordination, and concentration. Holding brushes and controlling paint movements strengthens finger coordination and supports precise hand movements.Mixing watercolor shades introduces basic color theory and encourages observation, experimentation, and problem-solving. Children discover how different amounts of water affect color intensity and texture.Painting also promotes imagination, creativity, and emotional expression. Kids can communicate their ideas and feelings through artwork while developing artistic confidence.Group painting sessions encourage communication, cooperation, and sharing as children explore creative techniques together.
12. Recycled Materials Art Projects
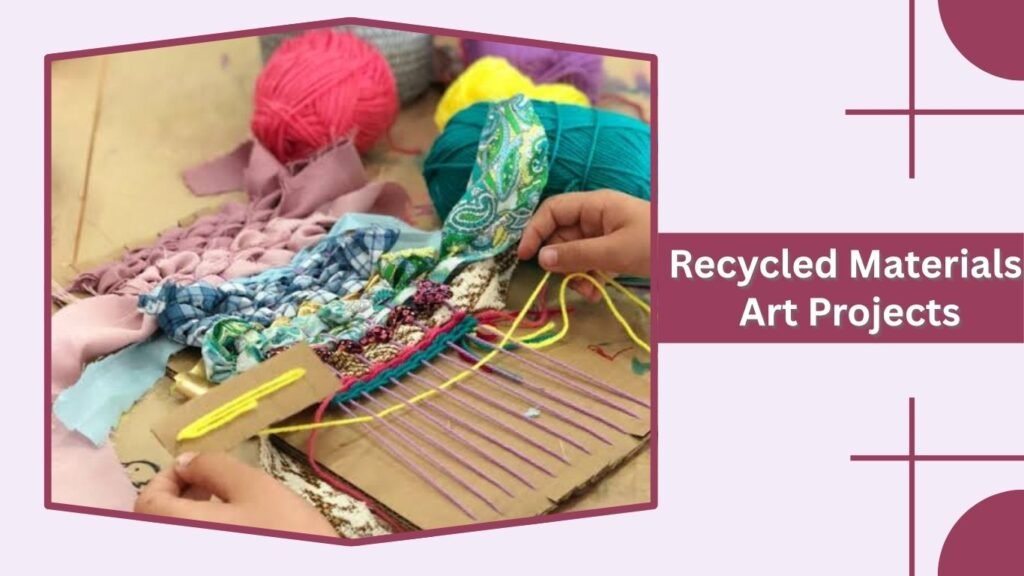
Recycled materials art projects are among the most affordable creative activities for kids, encouraging children to transform everyday household waste into colorful and imaginative artwork. Using cardboard, paper rolls, plastic containers, and other reusable materials, kids can create animals, decorative sculptures, and unique craft projects. This hands-on activity promotes creativity, environmental awareness, and problem-solving while reducing unnecessary waste. Whether creating miniature buildings or imaginative characters, children can enjoy discovering new ways to reuse ordinary objects.
Materials Needed
- Cardboard Boxes: Clean, recycled boxes for creating structures, sculptures, and decorative objects.
- Paper Rolls: Empty toilet paper or paper towel rolls for making animals and craft figures.
- Plastic Containers: Clean, lightweight containers suitable for creative projects.
- Bottle Caps: Large, child-safe caps for decorating artwork and building patterns.
- Colored Paper: Construction paper for adding colorful details and decorations.
- Safety Scissors: Child-friendly scissors for cutting paper and lightweight materials.
- Glue Sticks: Non-toxic adhesive for attaching recycled craft components.
- Markers and Crayons: Useful for drawing faces, patterns, and decorative designs.
- Washable Paint: Child-safe paint for adding colorful finishes to recycled creations.
How to Make Recycled Materials Art Projects
Start by collecting clean and safe recyclable materials from around the house. Encourage children to examine different objects and imagine how they could be transformed into creative artwork.A cardboard box can become a miniature house, while empty paper rolls can be decorated to resemble animals, robots, or imaginary characters. Plastic containers can also be turned into decorative planters or pretend vehicles.Help younger children arrange materials and attach pieces using child-safe glue or tape. Older kids can experiment with more detailed structures and creative designs.Encourage children to paint their creations, add colorful paper decorations, and invent stories about the objects they build.Once completed, display the artwork or incorporate the creations into imaginative play activities.
Learning and Development Benefits
Recycled art projects help children develop creativity, fine motor skills, and hand-eye coordination. Cutting, gluing, painting, and assembling materials encourage precise movements and concentration.Transforming ordinary objects into new creations supports problem-solving, critical thinking, and spatial awareness. Children learn to recognize shapes, explore different textures, and experiment with basic construction techniques.This activity also introduces environmental concepts such as recycling, reusing materials, and reducing waste.Group crafting encourages teamwork, communication, and cooperation. Completing recycled artwork can improve confidence and provide a sense of accomplishment.
13. DIY Mask Making

DIY mask making is a fun and imaginative creative activity that allows kids to design colorful animal faces, superhero disguises, and fantasy characters using simple craft materials. Children can transform paper plates, cardboard, and colored paper into personalized masks while exploring artistic expression and pretend play. This affordable indoor activity encourages creativity, concentration, and fine motor development. Whether preparing masks for a costume party or organizing a pretend adventure, kids can enjoy creating unique characters and bringing their imaginations to life.
Materials Needed
- Paper Plates: Lightweight plates for creating simple animal and character masks.
- Cardboard: Thin cardboard for making durable mask shapes.
- Colored Paper: Construction paper for adding ears, noses, and decorative details.
- Safety Scissors: Child-friendly scissors for cutting lightweight craft materials.
- Glue Sticks: Non-toxic adhesive for attaching decorations.
- Markers and Crayons: Useful for drawing facial features and colorful patterns.
- Washable Paint: Child-safe paint for decorating mask surfaces.
- Craft Sticks: Smooth wooden sticks for creating handheld masks.
- Elastic Bands: Optional materials for securing masks, used with appropriate adult supervision.
How to Make DIY Masks
Start by helping children choose a mask design based on their favorite animals, superheroes, or imaginary characters. Paper plate masks are excellent for beginners because they provide a simple base for decorating.Ask children to draw their chosen character’s facial features on the paper plate. An adult can carefully cut suitable eye openings if the mask will be worn.Encourage kids to decorate the mask using colored paper, markers, and washable paint. They can add paper ears to create animal characters or use bright geometric shapes for imaginative superhero designs.For a simple handheld mask, attach a smooth craft stick securely to the bottom of the decorated plate. Older children may enjoy creating more detailed masks using layered cardboard and additional paper decorations.
Learning and Development Benefits
DIY mask making helps children improve fine motor skills, hand-eye coordination, and concentration. Drawing, cutting, gluing, and decorating encourage precise finger movements and artistic control.Designing different characters promotes imagination, creative thinking, and problem-solving. Children experiment with shapes, colors, and facial expressions while exploring different artistic styles.Pretend play with handmade masks supports language development, storytelling, and emotional expression. Kids can explore different roles and practice communicating through imaginative characters.
14. Leaf Printing Art
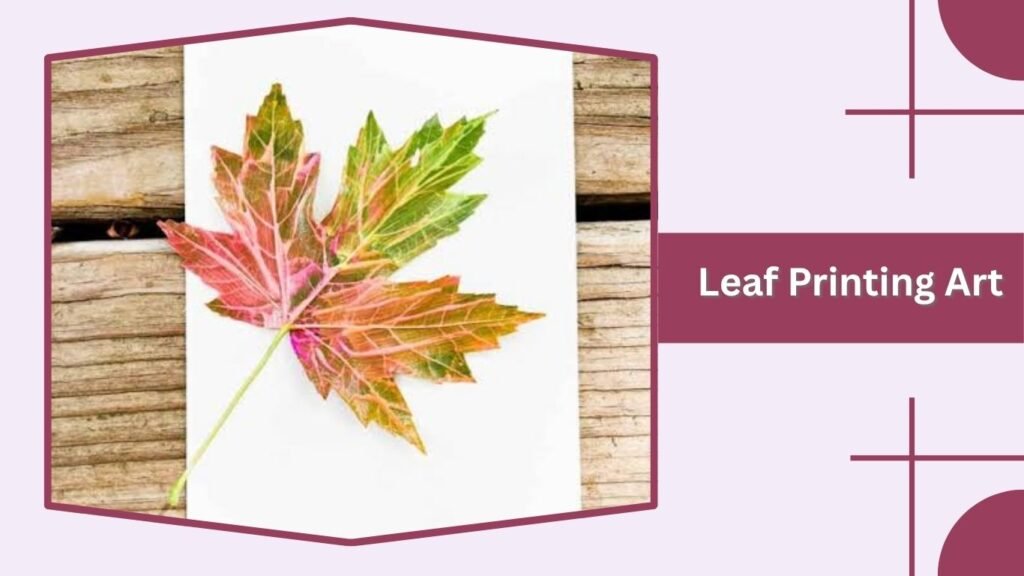
Leaf printing art is one of the most enjoyable creative activities for kids, allowing children to transform natural leaves into colorful patterns and beautiful artwork. Using simple paints, paper, and freshly collected leaves, kids can explore different shapes, textures, and designs while expressing their imagination. This affordable activity combines nature exploration with hands-on artistic learning. Whether creating decorative greeting cards, colorful landscapes, or unique leaf patterns, children can enjoy discovering the beauty of nature through creative printing techniques.
Materials Needed
- Fresh Leaves: Leaves in different shapes and sizes with visible veins and interesting textures.
- Washable Paints: Non-toxic, child-safe paints in a variety of bright colors.
- Drawing Paper: Thick white paper or construction paper for creating leaf impressions.
- Paintbrushes: Soft brushes for applying paint evenly to leaf surfaces.
- Paint Trays: Small plastic containers for holding different paint colors.
- Paper Towels: Useful for removing excess paint and cleaning supplies.
- Protective Aprons: Washable aprons or old shirts to protect children’s clothing.
- Table Cover: Newspaper or reusable plastic sheets for protecting furniture.
- Colored Pencils: Optional tools for adding decorative details to finished prints.
How to Make Leaf Printing Art
Start by taking children on a short nature walk to collect suitable fallen leaves. Encourage them to choose leaves with interesting shapes and clearly visible veins.Wash the collected leaves gently if necessary and allow them to dry. Prepare a clean workspace with drawing paper, paints, and brushes.Ask children to select a leaf and apply a thin layer of washable paint to its underside using a soft paintbrush. Carefully place the painted side onto the paper and press gently with their fingers.Lift the leaf slowly to reveal the printed pattern. Children can repeat the process using different leaves and colors to create colorful designs.
Learning and Development Benefits
Leaf printing art helps children develop fine motor skills, hand-eye coordination, and concentration. Applying paint and pressing leaves onto paper encourages controlled hand movements and precision.Exploring different leaf shapes introduces children to natural patterns, textures, and symmetry. Kids develop observation skills as they compare leaf sizes, edges, and vein structures.Experimenting with colors and printing arrangements promotes creativity, imagination, and problem-solving. Children also gain a greater appreciation for plants and their natural surroundings.Group printing activities encourage communication, cooperation, and sharing while allowing kids to exchange creative ideas.
15. Clay Modeling
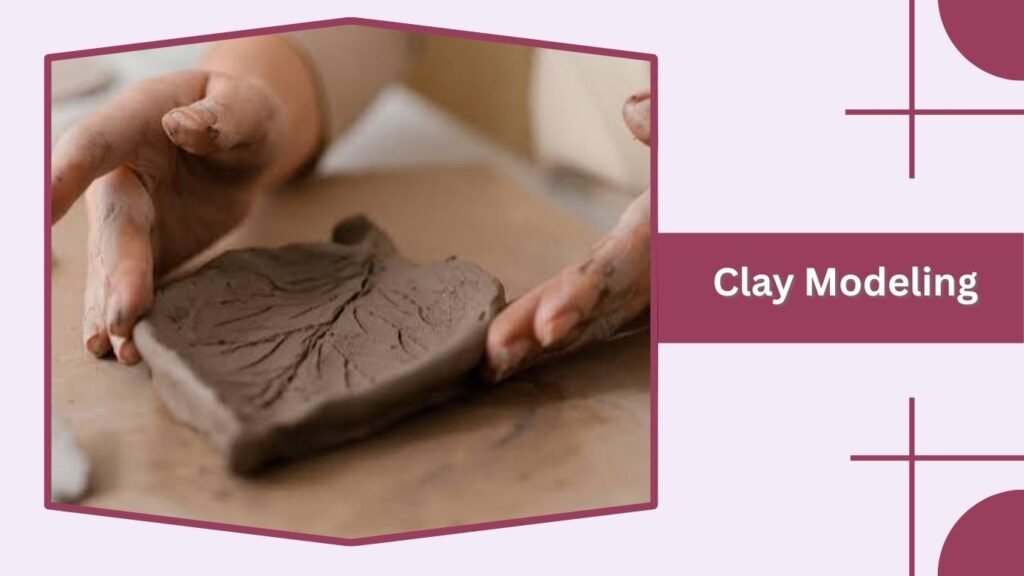
Clay modeling is a fun and imaginative creative activity that allows kids to transform soft modeling materials into colorful sculptures, animals, and decorative objects. Children can shape clay using their hands and simple tools while exploring textures, patterns, and three-dimensional designs. This hands-on activity encourages artistic expression, concentration, and problem-solving skills. Whether creating miniature animals, pretend food, or handmade decorations, clay modeling provides an engaging way for children to develop creativity and enjoy meaningful indoor entertainment.
Materials Needed
- Modeling Clay: Non-toxic, age-appropriate clay suitable for children’s sculpting projects.
- Air-Dry Clay: Optional clay that hardens naturally without requiring a kiln.
- Rolling Pin: A small plastic rolling pin for flattening clay.
- Clay Sculpting Tools: Child-friendly plastic tools for shaping and adding details.
- Shape Cutters: Plastic cutters for making stars, hearts, and geometric designs.
- Craft Mat: A washable surface for protecting tables during modeling.
- Water Container: A small container of water for smoothing suitable clay surfaces.
- Washable Paints: Optional child-safe paints for decorating dried clay creations.
- Storage Containers: Airtight containers for keeping reusable modeling clay soft.
How to Enjoy Clay Modeling
Start by preparing a clean crafting area and placing small portions of modeling clay on a protective mat. Encourage children to explore the texture by rolling, flattening, squeezing, and shaping the material.Younger kids can begin by creating simple balls, snakes, stars, and basic animal shapes. Older children may enjoy sculpting miniature houses, flowers, cartoon characters, or decorative bowls.Introduce plastic sculpting tools and shape cutters to help children create interesting textures and detailed designs. Encourage them to combine different clay shapes to build unique objects.If using air-dry clay, allow the finished sculptures to harden according to the manufacturer’s instructions. Once completely dry, children can decorate suitable creations with washable paints.Display their completed artwork to celebrate their creativity and encourage further artistic exploration.
Learning and Development Benefits
Clay modeling helps children strengthen fine motor skills, hand-eye coordination, and finger muscles. Rolling, pinching, squeezing, and sculpting clay encourage controlled movements and improve dexterity.Creating three-dimensional objects introduces concepts such as shape, size, balance, and spatial relationships. Children learn to solve problems as they experiment with different construction techniques.The activity also supports sensory development through exploring textures and manipulating soft materials. Designing original sculptures encourages imagination, artistic expression, and independent thinking.
16. DIY Comic Book Creation

DIY comic book creation is one of the most exciting creative activities for kids, allowing children to combine storytelling, drawing, and imagination into colorful illustrated adventures. Kids can invent superheroes, create funny characters, and develop imaginative stories using simple art supplies. This affordable indoor activity encourages artistic expression, writing skills, and creative thinking while providing hours of entertainment. Whether designing an action-packed superhero comic or a humorous animal adventure, children can enjoy bringing their original stories to life.
Materials Needed
- Drawing Paper: White paper or blank comic book templates for creating illustrated stories.
- Pencils: Useful for sketching characters, scenes, and comic panel layouts.
- Erasers: For correcting drawings and adjusting story designs.
- Colored Pencils: Bright colors for decorating characters and backgrounds.
- Markers: Fine-tip markers for outlining drawings and writing dialogue.
- Rulers: Helpful for drawing straight panel borders and organizing comic pages.
- Story Templates: Printable comic strips with empty panels and speech bubbles.
- Stapler: An adult-operated tool for assembling completed comic book pages.
- Stickers: Optional decorations for adding creative details to comic book covers.
How to Make a DIY Comic Book
Start by encouraging children to choose a story theme that interests them. Popular ideas include superhero adventures, talking animals, magical kingdoms, and funny school experiences.Help kids create their main characters by choosing names, personalities, and special abilities. Next, encourage them to develop a simple story with a beginning, middle, and ending.Divide each paper into several comic panels using a ruler. Children can sketch different scenes inside the panels and add speech bubbles to show what their characters are saying.Once the drawings are complete, encourage kids to color their illustrations and add background details. Older children can experiment with different panel sizes, sound effects, and expressive character designs.
Learning and Development Benefits
DIY comic book creation helps children improve storytelling, reading, writing, and communication skills. Organizing events into illustrated panels strengthens sequencing, logical thinking, and narrative development.Drawing characters and writing dialogue encourage creativity, imagination, and emotional expression. Children learn to communicate ideas through both pictures and written language.The activity also develops fine motor skills, hand-eye coordination, and concentration. Planning comic layouts introduces spatial awareness and basic visual design concepts.Sharing completed comics with family members or friends can build confidence and encourage positive social interaction.
17. Paper Plate Animal Crafts

Paper plate animal crafts are fun and affordable creative activities that allow kids to transform ordinary paper plates into colorful animal characters. Children can design lions, elephants, butterflies, owls, and other favorite animals using paint, colored paper, and simple decorations. This hands-on activity encourages imagination, artistic expression, and fine motor development while providing enjoyable indoor entertainment. Whether creating jungle animals or farm characters, paper plate crafts offer an exciting opportunity for kids to explore creativity using everyday household materials.
Materials Needed
- Paper Plates: Plain, sturdy paper plates for creating animal faces and bodies.
- Colored Paper: Construction paper for making ears, tails, wings, and decorative features.
- Safety Scissors: Child-friendly scissors for cutting paper shapes.
- Glue Sticks: Non-toxic adhesive for attaching decorations securely.
- Washable Paints: Child-safe paints for coloring paper plates.
- Paintbrushes: Soft brushes for applying colors and creating patterns.
- Markers and Crayons: Useful for drawing eyes, noses, mouths, and animal markings.
- Craft Feathers: Optional decorations for creating bird-themed crafts.
- Yarn: Short pieces of colorful yarn for adding animal manes and other details.
How to Make Paper Plate Animal Crafts
Start by helping children choose an animal they would like to create. Lions, cats, owls, and butterflies are excellent beginner projects because their features can be made using simple shapes.Place a clean paper plate on a protected table and encourage kids to paint it using colors associated with their chosen animal. For example, yellow or orange paint works well for a lion, while brown shades can be used for an owl.Once the paint dries, help children cut ears, wings, tails, or other features from colored paper. Attach these pieces to the paper plate using a glue stick.Encourage kids to draw facial expressions, patterns, and decorative details with markers. They can add short yarn pieces for a lion’s mane or paper feathers for a colorful bird.
Learning and Development Benefits
Paper plate animal crafts help children strengthen fine motor skills, hand-eye coordination, and concentration. Cutting paper, applying glue, and painting surfaces encourage careful hand movements.Creating animal characters introduces children to different shapes, colors, and patterns. The activity also supports basic animal recognition and encourages curiosity about wildlife.Designing unique animal faces promotes imagination, creativity, and problem-solving. Children learn how simple materials can be combined to produce recognizable characters.
18. Creative Building with LEGO

Creative building with LEGO is one of the most engaging creative activities for kids, allowing children to transform colorful building bricks into imaginative structures, vehicles, animals, and miniature worlds. This hands-on activity encourages creativity, problem-solving, and spatial thinking while providing hours of entertainment. Whether constructing tall towers, designing futuristic cities, or inventing unique characters, LEGO building offers endless opportunities for experimentation. Children can enjoy working independently or collaborating with friends and family on exciting construction projects.
Materials Needed
- LEGO Bricks: Colorful building bricks in different shapes and sizes for creating unique structures.
- Baseplates: Flat building surfaces that provide stability for larger creations.
- LEGO Figures: Small characters for adding storytelling elements to completed designs.
- Building Instructions: Optional guides for learning basic construction techniques.
- Storage Containers: Boxes or organizers for sorting bricks by color, shape, or size.
- Building Table: A flat, sturdy surface for arranging and connecting pieces.
- Idea Cards: Simple picture prompts featuring houses, animals, vehicles, and imaginary buildings.
- Decorative Pieces: Windows, doors, wheels, and other compatible accessories for detailed creations.
How to Enjoy Creative Building with LEGO
Start by arranging LEGO bricks on a clean table or building mat. Encourage children to choose a project based on their interests, such as creating a colorful house, a racing car, or an imaginative castle.Younger children can begin with simple towers and basic structures using larger, age-appropriate building bricks. Older kids may enjoy designing detailed buildings, bridges, robots, or miniature cities.Encourage children to experiment with different shapes and construction techniques rather than relying entirely on instructions. They can combine bricks to create original designs and modify their structures whenever new ideas develop.
Learning and Development Benefits
Creative LEGO building helps children strengthen fine motor skills, hand-eye coordination, and concentration. Connecting and separating bricks develops finger control and precise hand movements.Building three-dimensional structures introduces concepts such as balance, symmetry, measurement, and spatial relationships. Children also develop problem-solving skills when adjusting designs or improving structural stability.This activity encourages creativity, imagination, and independent thinking. Kids learn to plan projects, experiment with ideas, and overcome construction challenges.Group building sessions promote teamwork, communication, and cooperation. Completing a challenging creation can improve confidence and provide a rewarding sense of accomplishment.
19. DIY Tie-Dye Art
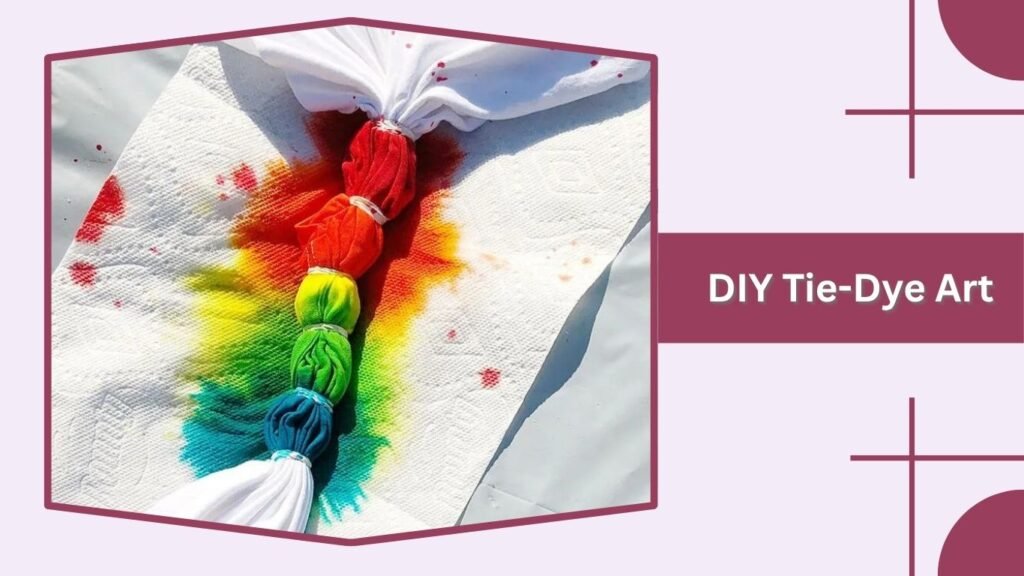
DIY tie-dye art is a colorful and exciting creative activity that allows kids to transform plain fabric into beautiful patterns using different dyeing techniques. Children can experiment with bright colors, spirals, stripes, and unique designs while learning how fabric absorbs color. This hands-on activity encourages artistic expression, imagination, and patience. Whether decorating T-shirts, tote bags, or fabric squares, DIY tie-dye art provides an entertaining way for kids to create personalized accessories and handmade gifts.
Materials Needed
- Plain Cotton Fabric: White T-shirts, tote bags, or fabric squares suitable for dyeing.
- Fabric Dye: Age-appropriate, non-toxic dye products designed for the selected fabric.
- Rubber Bands: Used to secure folded fabric and create different patterns.
- Squeeze Bottles: Plastic bottles for applying fabric dye to specific areas.
- Protective Gloves: Suitable gloves for preventing dye stains on hands.
- Plastic Trays: Containers for holding fabric during the dyeing process.
- Protective Aprons: Old shirts or washable aprons for protecting clothing.
- Table Cover: Plastic sheets or reusable protective mats for preventing stains.
- Plastic Bags: Useful for holding dyed fabric while colors develop.
How to Make DIY Tie-Dye Art
Start by choosing a plain cotton T-shirt or fabric square and preparing a protected workspace. Follow the fabric dye manufacturer’s instructions for washing, dampening, or preparing the material.Encourage children to select their favorite colors and decide which patterns they want to create. For a spiral design, gently twist the fabric from the center and secure it with rubber bands.For striped patterns, fold the fabric into sections and wrap rubber bands around different areas. Adults should prepare the dye according to product instructions and assist younger children with applying colors.Allow kids to carefully squeeze the dye onto different sections of the fabric. Encourage experimentation with color combinations while avoiding excessive mixing that may create muddy shades.
Learning and Development Benefits
DIY tie-dye art helps children develop fine motor skills, hand-eye coordination, and concentration. Folding fabric, securing rubber bands, and applying colors encourage controlled hand movements.Experimenting with color combinations introduces basic artistic concepts and encourages creative thinking. Children discover how folding techniques influence the appearance of patterns.The activity also promotes problem-solving, observation, and patience as children wait for their designs to develop. Each finished project provides a unique result that encourages self-expression.Group tie-dye sessions support cooperation, communication, and sharing. Creating personalized clothing can strengthen confidence and provide a sense of accomplishment.
20. Origami Paper Folding
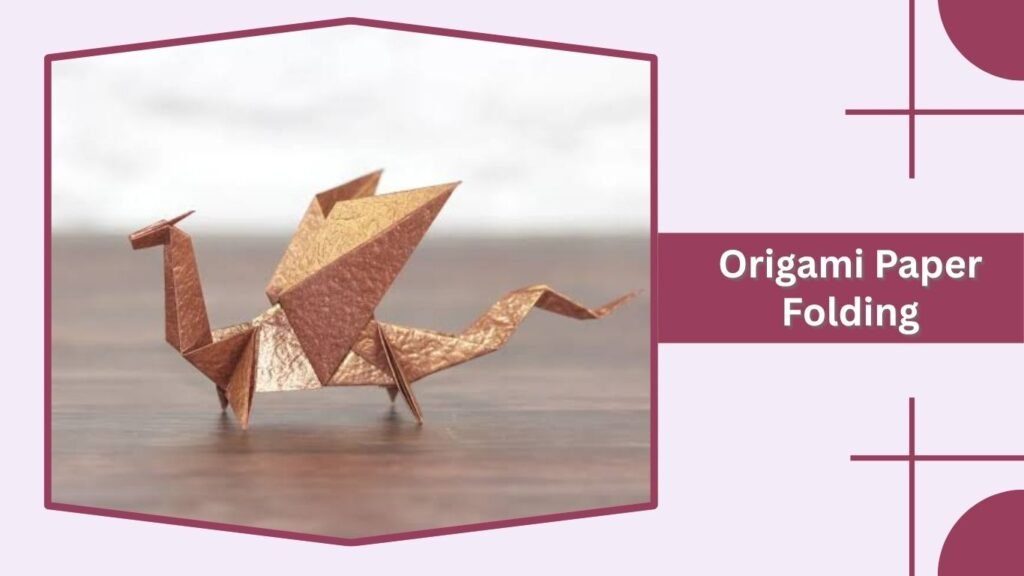
Origami paper folding is one of the most enjoyable creative activities for kids, allowing children to transform simple sheets of paper into beautiful animals, flowers, and decorative shapes. This traditional paper art encourages imagination, patience, and concentration while introducing children to basic folding techniques. Whether creating colorful paper cranes, butterflies, boats, or jumping frogs, origami provides an affordable and entertaining indoor activity. Kids can explore different designs while developing artistic skills and discovering how paper can become amazing three-dimensional creations.
Materials Needed
- Origami Paper: Lightweight square sheets designed specifically for paper folding.
- Colored Paper: Bright construction paper for creating colorful designs.
- Pattern Instructions: Simple illustrated guides showing different folding techniques.
- Pencils: Useful for marking folding lines and adding decorative details.
- Markers and Crayons: For drawing faces, patterns, and colorful decorations.
- Stickers: Optional accessories for personalizing completed paper creations.
- Ruler: Helpful for measuring paper and creating accurate square sheets.
- Flat Table: A clean, stable surface for folding paper comfortably.
- Storage Box: A small container for organizing finished origami creations.
How to Enjoy Origami Paper Folding
Start by choosing a simple origami project based on your child’s age and abilities. Paper boats, airplanes, and basic animal faces are excellent options for beginners.Provide children with square sheets of colorful paper and demonstrate basic folding techniques. Encourage them to align the paper edges carefully and press along each fold to create neat creases.Younger children can begin with simple shapes that require only a few folds, while older kids may enjoy creating butterflies, jumping frogs, or decorative flowers.Follow illustrated instructions together and allow children to repeat each step until they feel comfortable. Encourage experimentation with different paper colors, sizes, and patterns.Once the origami creations are complete, children can decorate them with markers or stickers and display their artwork around the home.
Learning and Development Benefits
Origami paper folding helps children strengthen fine motor skills, hand-eye coordination, and concentration. Folding paper accurately encourages precise finger movements and improves manual control.Following step-by-step instructions develops sequencing, memory, and problem-solving abilities. Children also explore mathematical concepts such as symmetry, geometry, fractions, and spatial relationships.This activity promotes patience, creativity, and logical thinking as kids transform flat paper into three-dimensional objects.Group origami sessions encourage cooperation, communication, and sharing. Successfully completing challenging designs can strengthen confidence and provide a rewarding sense of accomplishment.
21. Homemade Slime Making

Homemade slime making is a fun and engaging creative activity for kids that combines sensory exploration, simple science, and imaginative play. Children can experiment with stretchy textures, colorful mixtures, and different slime consistencies while learning how materials interact. This popular indoor activity encourages curiosity, creativity, and hands-on learning. Whether making fluffy slime, colorful slime, or simple stretchy mixtures, kids can enjoy exploring fascinating textures while developing important observation and problem-solving skills.
Materials Needed
- Psyllium Husk Powder: An ingredient for creating a gel-like sensory slime alternative.
- Water: Clean water for mixing and adjusting the slime consistency.
- Food Coloring: Optional child-safe coloring for creating bright slime shades.
- Mixing Bowl: A suitable container for combining ingredients.
- Measuring Cups: Useful for measuring water and other materials accurately.
- Mixing Spoon: A sturdy spoon for stirring the mixture.
- Microwave-Safe Container: A large, suitable container for preparing heated slime with adult assistance.
- Sensory Tray: A shallow plastic tray for keeping slime contained during play.
- Storage Container: An airtight container for temporarily storing the finished mixture.
How to Make Homemade Slime
Start by selecting a simple, child-appropriate slime recipe. A psyllium-based mixture provides an alternative to recipes containing borax or contact lens solutions.An adult can combine approximately one tablespoon of psyllium husk powder with one cup of water in a sufficiently large microwave-safe container. Add a few drops of food coloring if desired and stir thoroughly.Allow the mixture to hydrate, then have an adult heat it carefully in short intervals, stirring between intervals until it develops a thick, gel-like consistency. The mixture can bubble and become extremely hot, so children should remain away from the heating process.Let the slime cool completely before allowing children to touch it. Once cool, transfer it to a sensory tray and encourage kids to stretch, squeeze, and shape the material.Children can experiment with different shapes and observe how the slime behaves when pulled slowly or pressed gently.
Learning and Development Benefits
Homemade slime making helps children develop sensory awareness, fine motor skills, and hand-eye coordination. Stretching, squeezing, and manipulating soft materials encourages finger control and strengthens hand muscles.Preparing slime introduces basic scientific concepts involving texture, consistency, and changes in materials. Children learn how ingredients combine and how different proportions affect the final mixture.The activity also supports creativity, curiosity, and problem-solving. Kids can observe how slime stretches, changes shape, and responds to movement.Sensory play may also help some children practice concentration and explore tactile experiences in a relaxed environment.
22. DIY Miniature Garden
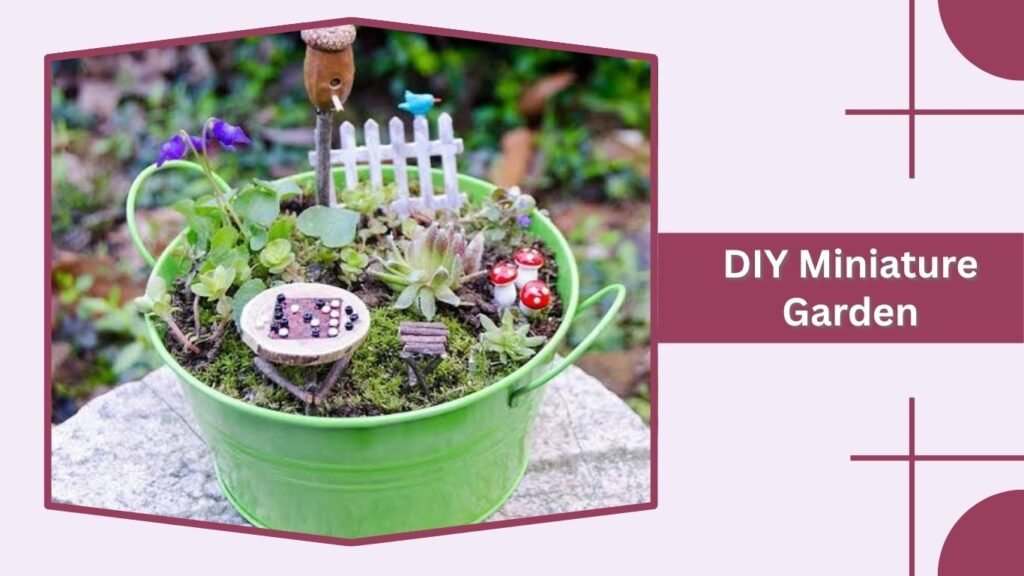
DIY miniature garden making is one of the most enjoyable creative activities for kids, allowing children to design tiny landscapes using plants, decorative stones, and imaginative accessories. Kids can create miniature fairy gardens, tiny forests, or colorful garden scenes inside small containers. This hands-on activity encourages creativity, environmental awareness, and problem-solving while introducing basic gardening skills. Whether designing a magical garden or creating a miniature nature scene, children can enjoy combining artistic expression with the beauty of plants.
Materials Needed
- Small Planters: Plastic pots, shallow containers, or recycled planters for creating miniature gardens.
- Potting Soil: Suitable gardening soil for supporting small plants.
- Miniature Plants: Small succulents, mosses, or compact plants appropriate for the growing conditions.
- Decorative Pebbles: Smooth stones for creating miniature pathways and garden borders.
- Miniature Figurines: Age-appropriate fairy houses, animals, and decorative garden accessories.
- Plastic Spoons: Child-friendly tools for arranging soil and planting small greenery.
- Colored Sand: Optional decorative material for creating colorful landscape patterns.
- Watering Can: A small watering container for gently watering plants.
- Craft Sticks: Useful for making miniature fences, signs, and garden decorations.
How to Make a DIY Miniature Garden
Start by choosing a small planter or shallow container with suitable drainage. Encourage children to imagine the type of miniature garden they want to create, such as a fairy village, tiny jungle, or peaceful garden landscape.Help kids fill the container with potting soil, leaving enough space for plants and decorations. Allow them to arrange small plants in different positions before gently placing their roots into the soil.Once the plants are positioned, encourage children to create miniature pathways using smooth pebbles or decorative sand. They can add tiny houses, animal figures, or handmade fences to bring their imaginative garden to life.For additional creativity, children can design miniature signs, bridges, or decorative structures using craft sticks and other safe materials.Water the plants according to their needs and place the finished garden in a suitable location with appropriate lighting.
Learning and Development Benefits
DIY miniature gardening helps children develop fine motor skills, hand-eye coordination, and concentration. Planting small greenery and arranging decorative objects encourage careful movements and precision.Designing miniature landscapes promotes creativity, imagination, and spatial awareness. Children learn to organize objects, compare sizes, and experiment with different layouts.This activity also introduces basic gardening concepts such as plant growth, sunlight, watering, and soil conditions. Caring for plants encourages patience, responsibility, and environmental awareness.Group miniature garden projects promote teamwork, communication, and cooperation. Watching plants grow can also provide children with a rewarding sense of accomplishment.
23. Shadow Puppet Theater

Shadow puppet theater is a fun and imaginative creative activity that allows kids to transform simple paper shapes into entertaining characters and stories using light and shadows. Children can design animals, superheroes, and fantasy creatures before bringing them to life on a homemade theater screen. This affordable indoor activity combines crafting, storytelling, and dramatic play while encouraging artistic expression. Whether performing a fairy tale or inventing an original adventure, shadow puppet theater provides hours of creative entertainment for children of different ages.
Materials Needed
- Black Construction Paper: Thick paper for creating recognizable puppet silhouettes.
- Cardboard: Recycled cardboard for building a simple theater frame.
- Craft Sticks: Smooth wooden sticks for holding and moving paper puppets.
- Safety Scissors: Child-friendly scissors for cutting puppet shapes.
- Glue or Tape: Non-toxic adhesive for attaching puppets to craft sticks.
- Flashlight: A battery-powered light source for projecting shadows.
- White Fabric: A thin white sheet or translucent paper for creating a shadow screen.
- Pencils: Useful for sketching puppet designs before cutting.
- Story Cards: Optional picture prompts for creating imaginative performances.
How to Make a Shadow Puppet Theater
Start by helping children choose characters for their shadow puppet performance. Popular options include animals, dragons, princesses, superheroes, and imaginary creatures.Encourage kids to draw simple character outlines on black construction paper. Help younger children cut out the shapes using safety scissors, and attach each puppet securely to a craft stick.Next, create a simple theater using a cardboard frame and a piece of thin white fabric or translucent paper. Position a battery-powered flashlight behind the screen to project the puppets’ shadows.Allow children to experiment with moving their puppets closer to or farther from the light source. They can observe how the shadows change in size and appearance.Once the theater is ready, encourage kids to create a short story with different characters, dialogue, and exciting events. Family members can become the audience while children perform their imaginative puppet shows.
Learning and Development Benefits
Shadow puppet theater helps children strengthen fine motor skills, hand-eye coordination, and concentration. Drawing, cutting, and moving paper puppets encourage careful hand movements.Creating stories and performing dialogue supports language development, imagination, and communication skills. Children learn to organize events, develop characters, and express emotions through storytelling.Experimenting with light and shadows introduces basic scientific concepts, including light direction, shadow formation, and changes in size.Group performances encourage teamwork, cooperation, and confidence. Children can practice speaking, listening, and sharing creative ideas while enjoying dramatic play.
24. Creative Photography Challenge
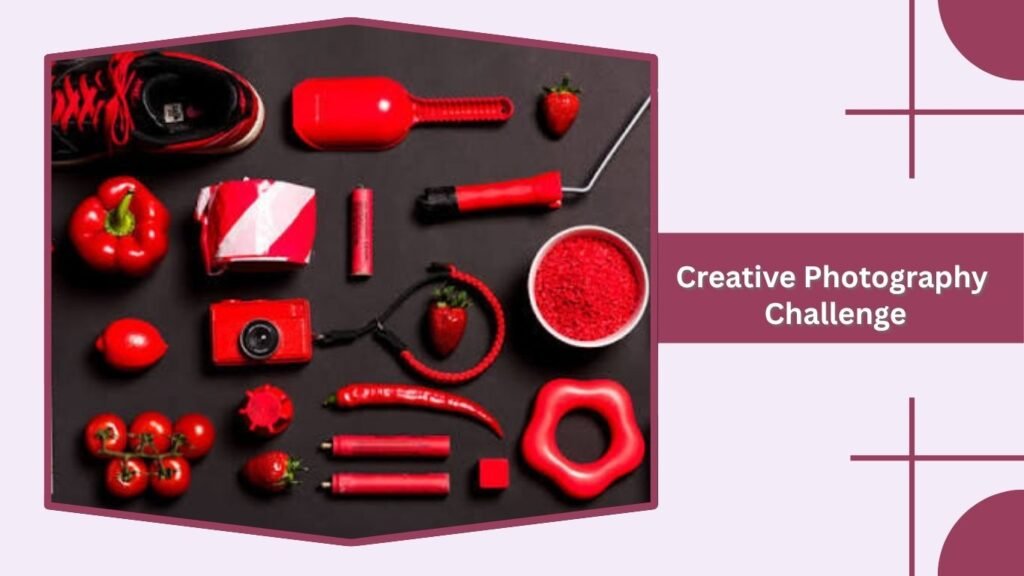
Creative photography challenges are exciting activities for kids that encourage children to explore their surroundings while capturing interesting pictures. Using a child-friendly camera or a supervised smartphone, kids can photograph nature, colorful objects, family pets, and imaginative scenes. This hands-on activity develops observation skills, artistic expression, and visual storytelling. Whether participating in an indoor photo challenge or exploring the backyard, children can enjoy experimenting with different angles, lighting, and subjects while discovering their unique photographic style.
Materials Needed
- Digital Camera: A child-friendly camera or supervised smartphone for taking photographs.
- Photography Checklist: A simple list of objects, colors, and scenes for children to capture.
- Notebook: Useful for recording photography ideas and creative observations.
- Colored Pencils: For sketching photo concepts and planning compositions.
- Toy Figures: Small toys or action figures for creating imaginative photo scenes.
- Colorful Backgrounds: Construction paper or fabric for setting up simple photography projects.
- Natural Objects: Flowers, leaves, stones, and other safe materials for photographing textures.
- Photo Album: A scrapbook or digital collection for organizing finished photographs.
- Decorative Stickers: Optional accessories for personalizing printed photo collections.
How to Enjoy a Creative Photography Challenge
Start by giving children a simple photography challenge based on their ages and interests. Popular themes include finding five colorful objects, photographing interesting shapes, or capturing different textures around the house.Explain how to hold the camera steadily and position subjects within the frame. Encourage kids to experiment with taking pictures from different heights and angles.Younger children can photograph toys, flowers, or everyday household objects. Older kids may enjoy creating miniature scenes using action figures, exploring natural lighting, or telling stories through a series of photographs.Introduce creative challenges such as photographing something round, finding an interesting shadow, or capturing three objects of the same color.Once the challenge is complete, encourage children to select their favorite photographs and arrange them into a digital gallery or handmade photo album.
Learning and Development Benefits
Creative photography challenges help children develop observation, concentration, and visual awareness. Searching for interesting subjects encourages them to notice colors, patterns, textures, and details in their surroundings.Experimenting with composition and lighting introduces basic artistic principles while encouraging creativity and problem-solving.The activity also strengthens visual storytelling skills as children learn to communicate ideas through photographs. Organizing pictures into sequences supports logical thinking and creative expression.Sharing completed photo projects with family members can improve communication and confidence. Group photography challenges also encourage cooperation, patience, and teamwork.
25. DIY Greeting Card Making
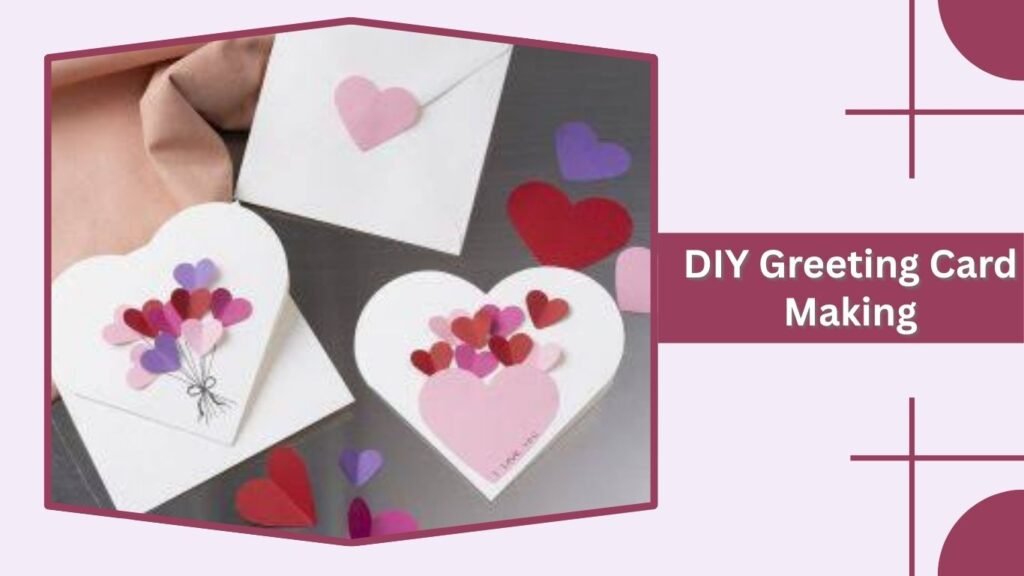
DIY greeting card making is one of the most meaningful creative activities for kids, allowing children to design personalized cards for birthdays, holidays, and special occasions. Using colorful paper, markers, stickers, and simple decorations, kids can create unique handmade cards that express their feelings and imagination. This affordable indoor activity encourages artistic expression, fine motor development, and thoughtful communication. Whether making cards for family members, teachers, or friends, children can enjoy creating heartfelt gifts using everyday craft supplies.
Materials Needed
- Cardstock Paper: Thick, colorful paper for creating sturdy greeting cards.
- Construction Paper: Bright craft paper for making decorative shapes and designs.
- Safety Scissors: Child-friendly scissors for cutting paper and lightweight decorations.
- Glue Sticks: Non-toxic adhesive for attaching paper shapes and accessories.
- Markers and Crayons: Useful for writing messages and creating colorful illustrations.
- Stickers: Decorative accessories featuring animals, flowers, stars, and other patterns.
- Colored Pencils: For drawing detailed pictures and personalizing card designs.
- Craft Stamps: Optional stamps for creating attractive decorative patterns.
- Envelopes: Simple envelopes for storing and presenting finished greeting cards.
How to Make DIY Greeting Cards
Start by helping children choose an occasion for their handmade greeting card. Popular options include birthdays, thank-you messages, holidays, and celebrations for family members or friends.Provide each child with a sheet of colorful cardstock and demonstrate how to fold it in half to create a basic greeting card.Encourage kids to decorate the front using drawings, paper flowers, colorful shapes, or stickers. Younger children can make simple handprint designs, while older kids may enjoy creating layered decorations and detailed illustrations.Once the front design is complete, help children write a short personal message inside the card. Encourage them to express their feelings using their own words.
Learning and Development Benefits
DIY greeting card making helps children strengthen fine motor skills, hand-eye coordination, and concentration. Folding, cutting, gluing, and drawing encourage precise hand movements and improve finger control.Writing personal messages supports language development, spelling, and communication skills. Children learn how to express appreciation, kindness, and positive emotions through written words.Designing greeting cards also promotes creativity, imagination, and problem-solving. Kids experiment with colors, shapes, and decorative arrangements while developing artistic confidence.Making cards for others encourages empathy, thoughtfulness, and social connection. Giving a handmade card can help children understand the importance of kindness and meaningful gestures.
Safety Tips for Kids
Choose age-appropriate craft materials and supervise younger children when using scissors, glue, or decorative accessories. Provide blunt-tip safety scissors and washable, non-toxic adhesives.Avoid small beads, buttons, and other loose decorations that may present choking hazards for toddlers.Adults should handle craft knives, hot glue guns, and other sharp or heated tools. Keep the workspace organized and protect furniture from paint or glue spills.Encourage children to wash their hands after crafting and store scissors and adhesives safely when the activity is finished.With simple materials and proper supervision, DIY greeting card making can provide an affordable, educational, and rewarding creative experience for kids.
26. Sensory Art Activities

Sensory art activities are among the most engaging creative activities for kids, allowing children to explore different textures, colors, and materials through hands-on artistic experiences. Kids can experiment with soft fabrics, textured paper, colorful paints, and everyday craft supplies to create imaginative artwork. This interactive activity encourages sensory exploration, creativity, and fine motor development while providing enjoyable indoor entertainment. Whether creating textured collages or experimenting with sponge painting, children can discover exciting ways to express themselves through art.
Materials Needed
- Textured Paper: Corrugated cardboard, tissue paper, and construction paper for creating different surfaces.
- Washable Paints: Non-toxic, child-safe paints for colorful sensory artwork.
- Soft Sponges: Different sponge shapes for stamping and creating textured patterns.
- Cotton Balls: Soft materials for making clouds, animals, and decorative designs.
- Fabric Scraps: Pieces of felt, cotton, and other fabrics for exploring different textures.
- Glue Sticks: Non-toxic adhesive for attaching lightweight materials.
- Paintbrushes: Soft brushes for spreading paint and experimenting with textures.
- Craft Trays: Shallow containers for organizing sensory materials.
- Large Paper Sheets: Thick drawing paper for creating colorful artwork.
How to Enjoy Sensory Art Activities
Start by preparing a clean crafting area and arranging different sensory materials on a protected table. Encourage children to touch and explore the textures of paper, fabric, sponges, and other safe craft supplies.Introduce a simple textured collage activity by giving kids large sheets of paper and allowing them to arrange different materials into creative designs. They can glue soft cotton balls to create clouds or use textured cardboard to make imaginative landscapes.Another enjoyable option is sponge painting. Provide washable paints and soft sponges, then encourage children to stamp colorful patterns onto paper.Older children can experiment with combining several materials to create layered artwork. They may also enjoy comparing rough, smooth, soft, and bumpy surfaces.
Learning and Development Benefits
Sensory art activities help children develop fine motor skills, hand-eye coordination, and tactile awareness. Touching, squeezing, arranging, and painting different materials encourage precise hand movements and sensory exploration.Experimenting with textures and colors introduces basic concepts related to shapes, patterns, and material properties. Children develop observation and problem-solving skills as they discover how different materials interact.These activities also encourage imagination, creativity, and emotional expression. Children can explore artistic ideas while building confidence in their abilities.Group sensory art sessions promote communication, cooperation, and sharing. Describing different textures can also support vocabulary and language development.
27. DIY Treasure Map Making

DIY treasure map making is a fun and imaginative creative activity that allows kids to design mysterious islands, hidden pathways, and exciting adventure locations using simple art materials. Children can draw mountains, rivers, forests, and secret treasure spots while inventing stories about their imaginary worlds. This affordable indoor activity combines artistic expression with storytelling, problem-solving, and spatial awareness. Whether creating pirate-themed maps or organizing pretend treasure hunts, kids can enjoy transforming ordinary paper into exciting adventure guides.
Materials Needed
- Drawing Paper: Large sheets of white or beige paper for creating treasure maps.
- Colored Pencils: Different colors for drawing landscapes, pathways, and landmarks.
- Markers: Useful for outlining map features and marking treasure locations.
- Pencils: For sketching basic map layouts before adding details.
- Erasers: Helpful for correcting drawings and adjusting map designs.
- Tea-Stained Paper: Optional adult-prepared paper for creating an aged treasure map appearance.
- Stickers: Decorative accessories featuring stars, animals, and adventure symbols.
- Ruler: Useful for drawing straight pathways and map borders.
- String or Ribbon: For rolling and tying completed treasure maps.
How to Make a DIY Treasure Map
Start by giving children a large sheet of drawing paper and encouraging them to imagine an exciting treasure-hunting adventure. Ask them to decide where their treasure is hidden, such as a mysterious island, enchanted forest, or imaginary castle.Help kids sketch the basic outline of their map using pencils. They can draw mountains, rivers, lakes, caves, and winding pathways connecting different locations.Encourage children to add interesting landmarks, including bridges, trees, pirate ships, and secret tunnels. Mark the treasure location with a large X and create a dotted pathway leading toward it.Once the basic drawing is complete, allow kids to color their maps using pencils or markers. They can add a compass rose, decorative borders, and imaginative place names.For additional excitement, organize a pretend treasure hunt using the completed map. Hide an age-appropriate toy in a safe location and encourage children to follow their map to discover it.
Learning and Development Benefits
DIY treasure map making helps children develop creativity, imagination, and spatial awareness. Drawing landscapes and arranging landmarks encourages them to understand direction, distance, and location.Creating pathways and planning treasure routes strengthens logical thinking, sequencing, and problem-solving skills. Children also explore basic geography concepts while designing imaginary environments.Drawing, coloring, and writing place names support fine motor development, hand-eye coordination, and early literacy skills.Pretend treasure hunts encourage storytelling, communication, and teamwork. Children can collaborate on map designs, solve imaginary challenges, and share creative ideas.Completing a personalized treasure map can build confidence and provide a rewarding sense of accomplishment.
FAQs
1. What Are the Best Creative Activities for Kids?
The best creative activities for kids include paper crafting, finger painting, clay modeling, LEGO building, puppet making, and creative story writing. These activities encourage imagination, problem-solving, and artistic expression while helping children develop important motor and communication skills.
2. What Are Some Easy Creative Activities for Kids at Home?
Easy creative activities for kids at home include origami, paper plate crafts, rock painting, homemade playdough sculpting, and greeting card making. Most require inexpensive household materials and can be adapted for different ages and skill levels.
3. How Can I Encourage My Child to Be More Creative?
Encourage creativity by providing open-ended art supplies, allowing children to experiment freely, and introducing activities such as storytelling, painting, and building projects. Focus on their effort and imagination rather than expecting perfect results.
4. What Are the Benefits of Creative Activities for Kids?
Creative activities help children develop fine motor skills, concentration, imagination, and problem-solving abilities. Activities such as drawing, crafting, and storytelling also support emotional expression, communication, confidence, and social development.
5. What Are Some Budget-Friendly Creative Activities for Kids?
Budget-friendly creative activities include recycled materials art projects, cardboard box creations, nature collages, paper crafts, and DIY treasure maps. These activities use everyday household supplies or safe natural materials, making them affordable ways to keep children entertained and engaged.
